Making Cisco Mercantile, part 1 [Works_Cisco Townsite]
 : model drawings of Cisco Mercantile
I’m trying to duplicate the whole town of Cisco, Utah in N scale. Here, I represent the making of Cisco Mercantile
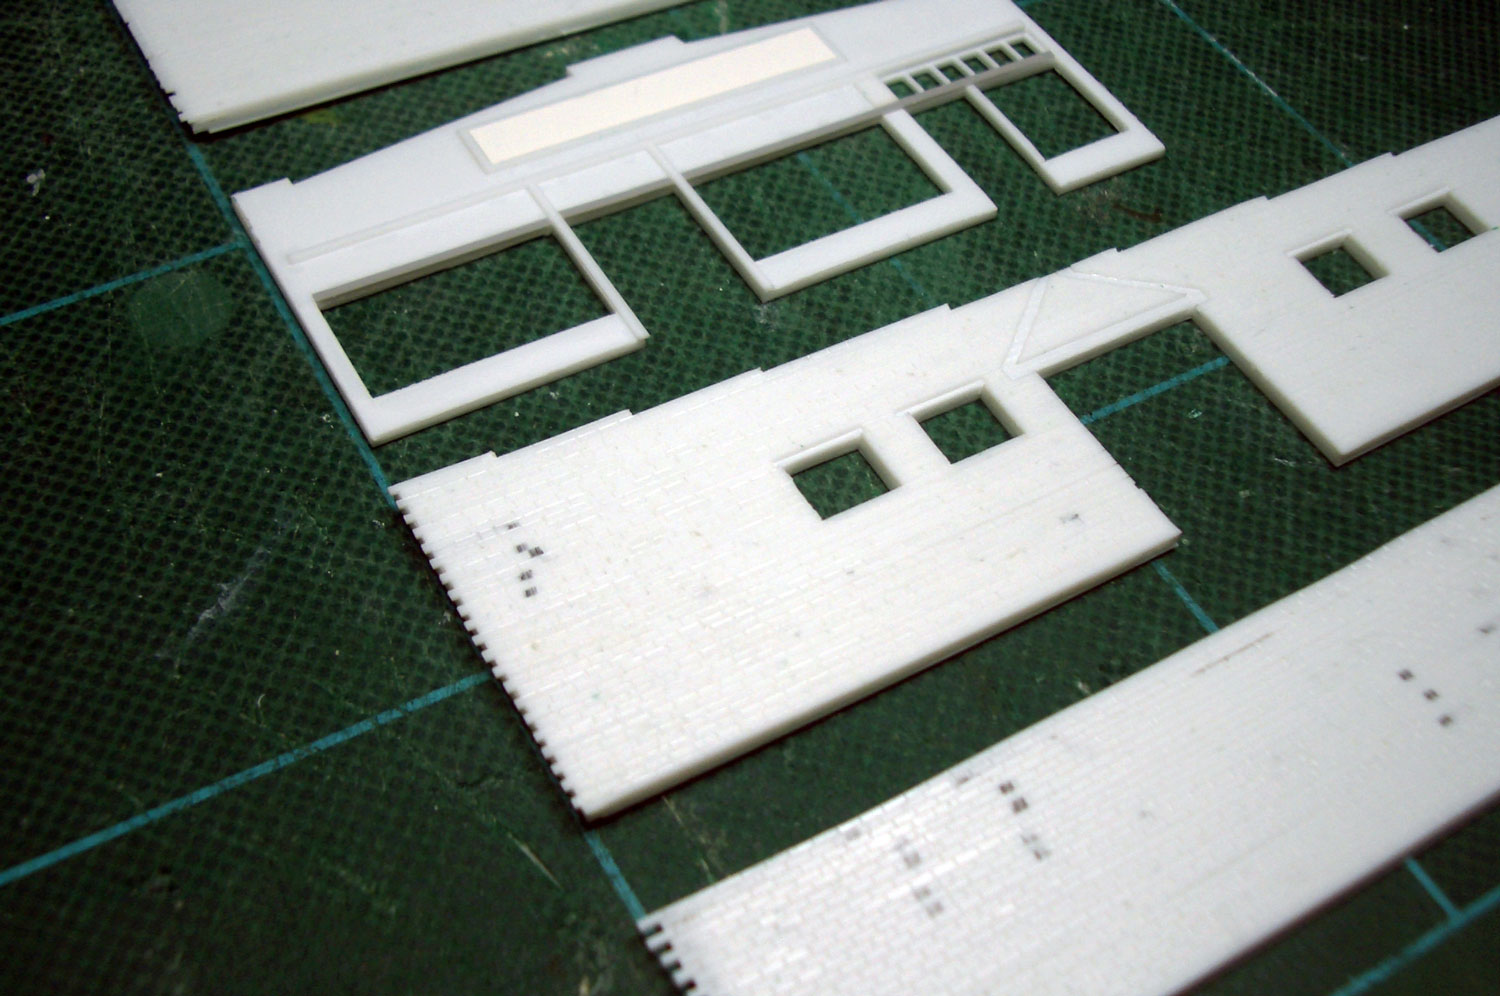 : brick/block walls
Cisco Mercantile was made of brick/block wall and tarpaper (maybe) roof. I tried to lay series of blocks, made from strip of styrene, level by level. The height of the series of blocks is about 0.8mm. Thanks to its irregular (large) block size, I could make it. Result is shown above.
 : windows
Windows are homemade. After applying painted strips of styrene on clear styrene sheet, I cut to exact size and applied the painted frame. Interior doors came from Tichy.
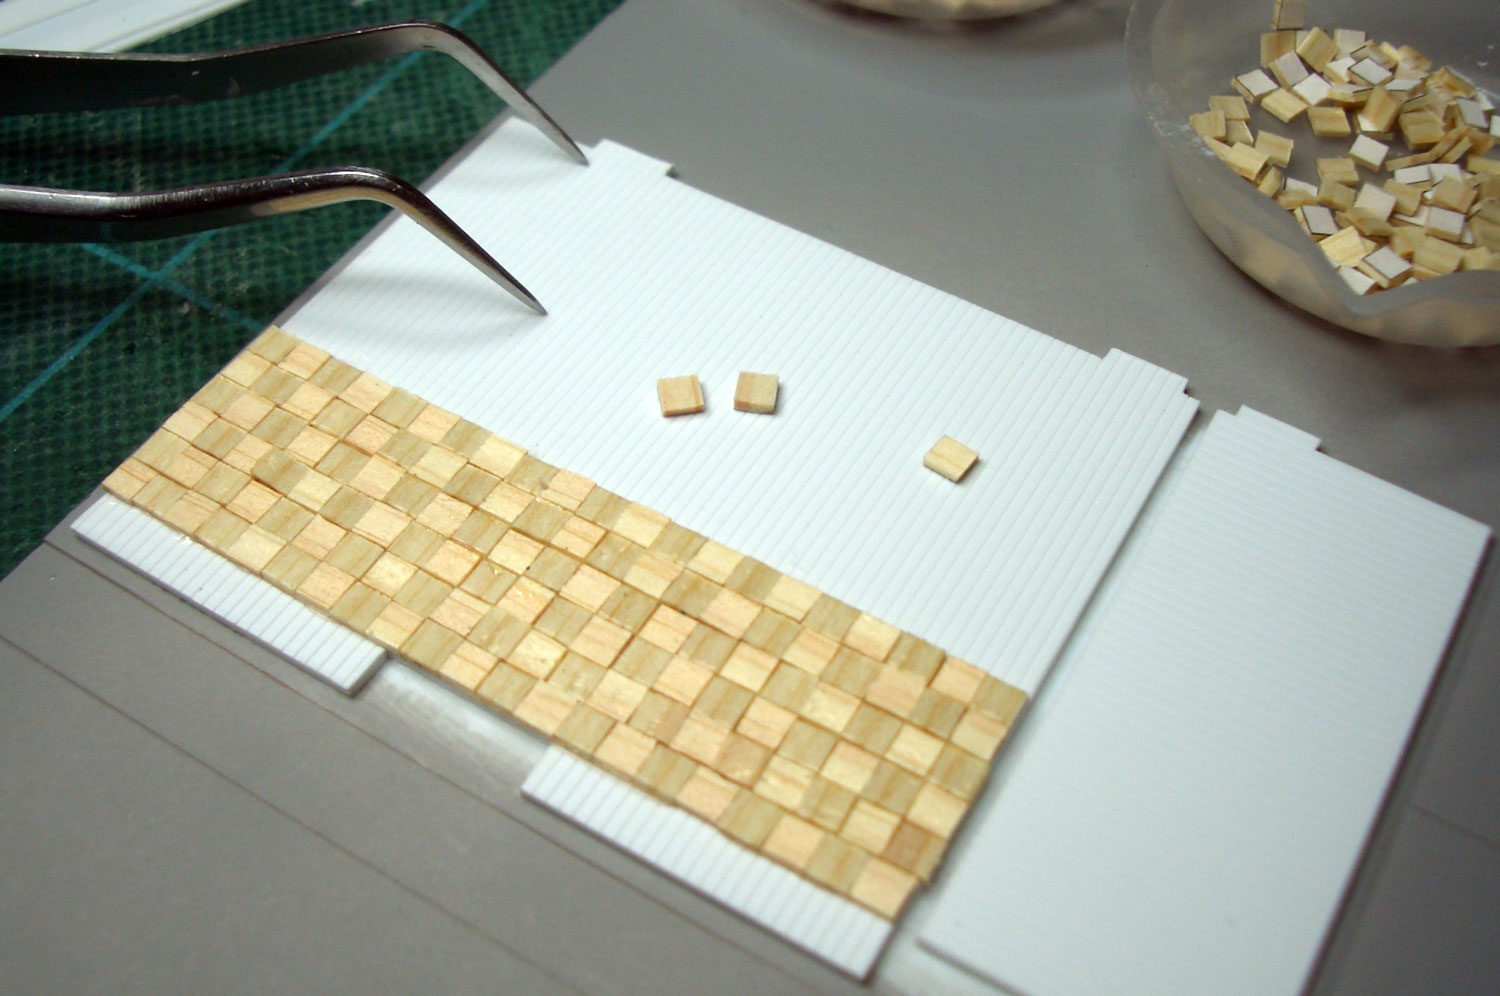 : applying the parquet
Thin wood is used for the roof trusses and floor. In Erich Hartmann’s photo, the floor seemed finished not with flooring but with sheet like linoleum. Model floor without texture and joints lacks charm. So I decided to finish with parquet flooring. I applied 18 scale inches square wood checkered. After the adhesive is dried, I leveled them using sandpaper. The parquets were dyed with thinned dark brown paint. Finally, walkways are again filed to represent the aging.
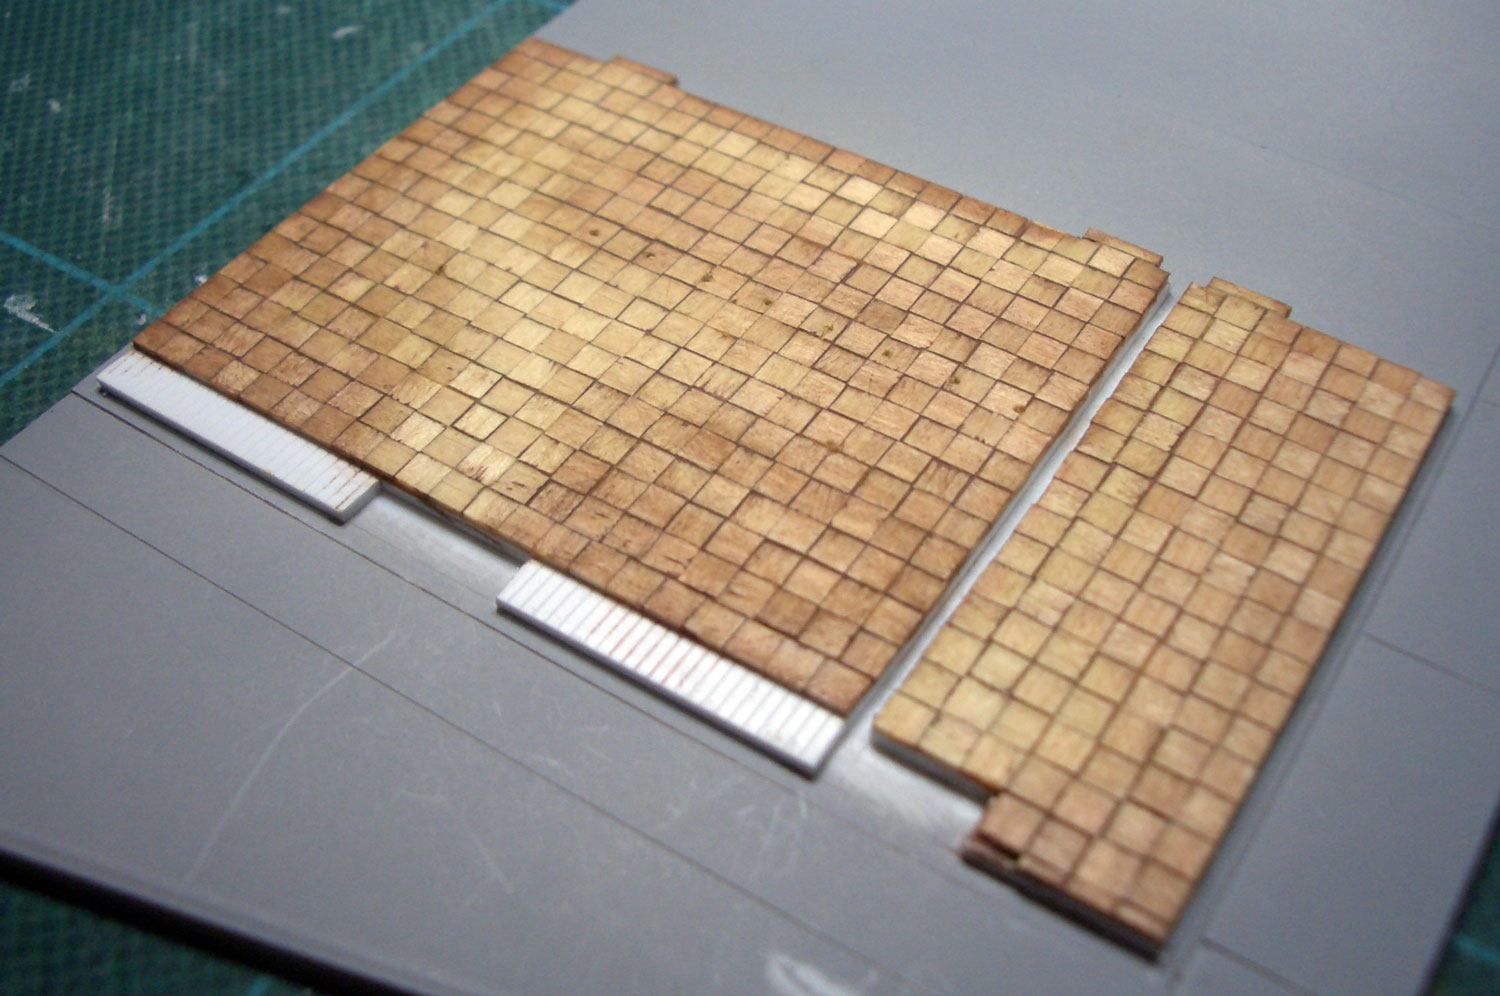 : finished parquet floor
I, first, painted the brick wall with brown primer. Next, I painted the wall dark brown using Tamiya TS-1. When paints were dried, I rubbed the compound into the joints. After all, I lightly filed the wall with sandpaper. The powder from the paint and the compound mingle in block joints to create the exact block wall.
Facade is spray painted with Tamiya TS-46. Cafe interior walls are painted with Tamiya AS-6.
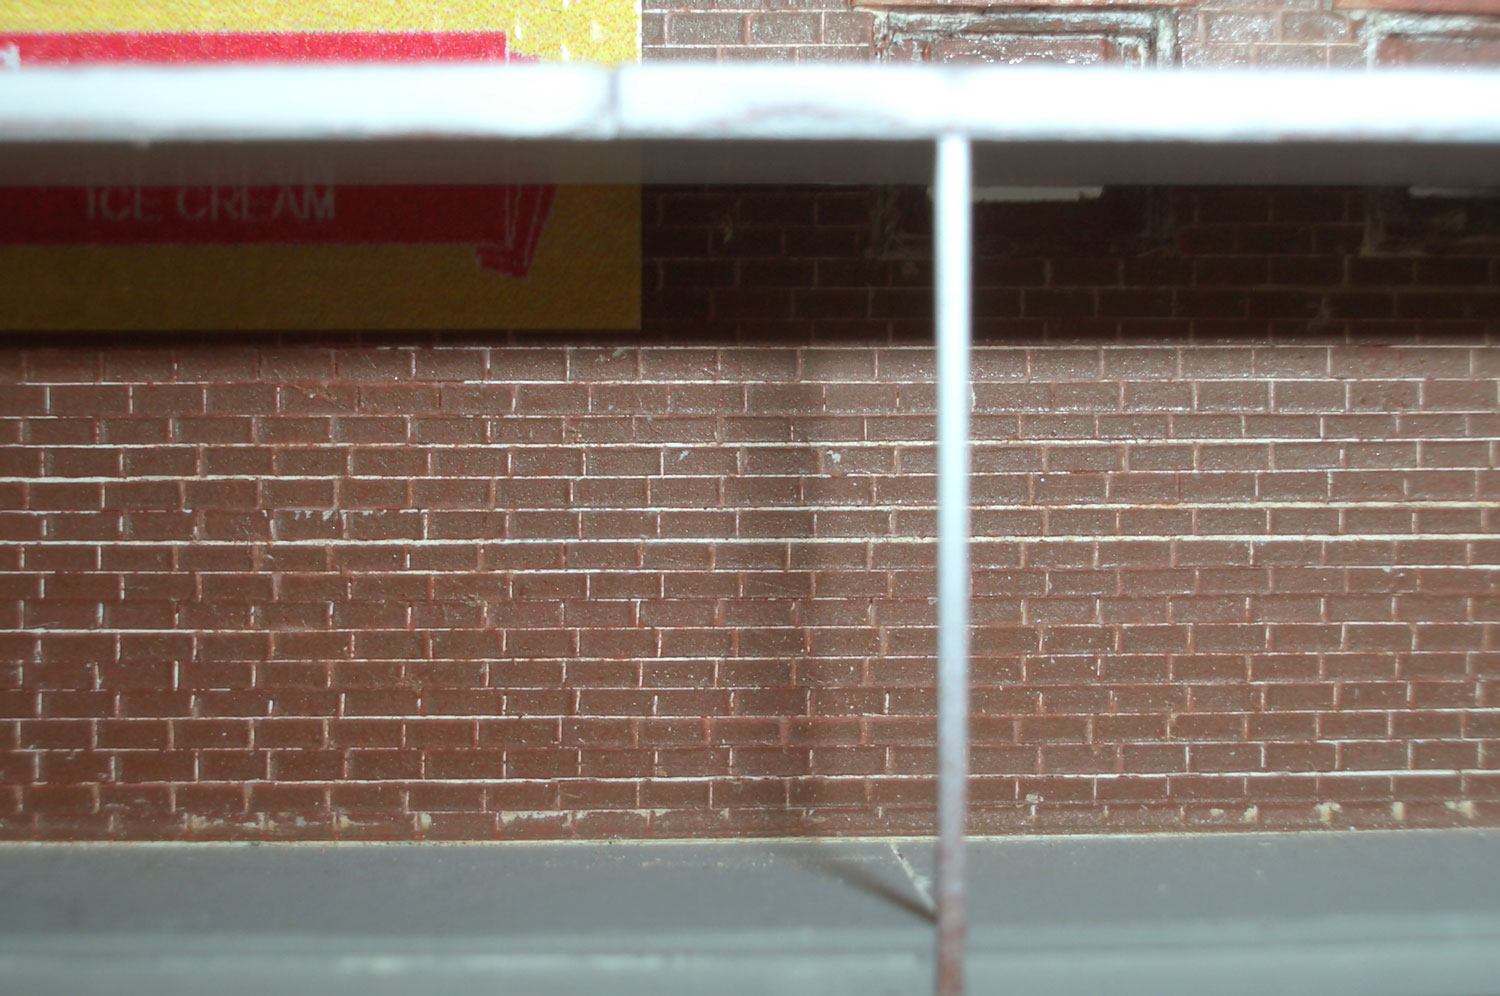 : finished block wall
「Cisco Mercantile」をNスケールで模型化しようとしている。
これまでのストラクチャアと同じく、主たる材料はプラ板、桧と真鍮板である。ブロック積みの壁は「Cisco Automotive Service」と同じ方法で一段ずつ積んでみた。この建物の使われているブロックは一般的なレンガよりは大きい。模型ではその高さが0.8ミリとなり、なんとか制作できた。
この建物の窓は桟の細い大きなもので、既成パーツでは間に合わないので自作した。透明プラ板にあらかじめ塗装しておいた極細のプラ板を接着してから切り出し、やはり塗装していた外枠を接着した。透明プラ板で裏打ちしてあるので見かけよりはしっかりしている。室内扉には既成パーツを用いた。
写真に写っているプロトタイプの床はリノリウムのように見える。それではつまらないのでパーケットブロックにしてみた。3ミリ角の桧を市松に張ってから、サンドペーパーで磨き仕上げた。屋根はいつものと同じく0.3mmの真鍮板とサンドペーパーである。
レンガ部分の塗装は、始めに茶色のサフェーサーを吹いてからタミヤのTS-1を吹いた。コンパウンドをレンガの目地にすり込んでからサンドペーパーを軽くかけると、生じる塗装粉とコンパウンドが混ざって、ちょうどいい感じになった。建物正面のベージュはタミヤのTS-46、カフェの内壁はAS-6である。
2013-11-15 09:00
コメント(0)
arx_Ph.D. さん
Here represented are my model railroad enthusiasm generated from the photos I took during my childhood at Knoxville, Tennessee, or from the photos I took during my recent trips.
I'm a retired professor of design, meanwhile a part-time associate at the architectural design office in Osaka, Japan where I live with my wife.


コメント 0