Simple iPhone N Scale Equipment Photography [Column_Photo Archives]
As I wrote in the previous post, I’m trying to use Apple iPhone for N scale model photography these days. The reason is that it became hard to manually focus through the small LCD on my Nikon D3300.
The Settings:
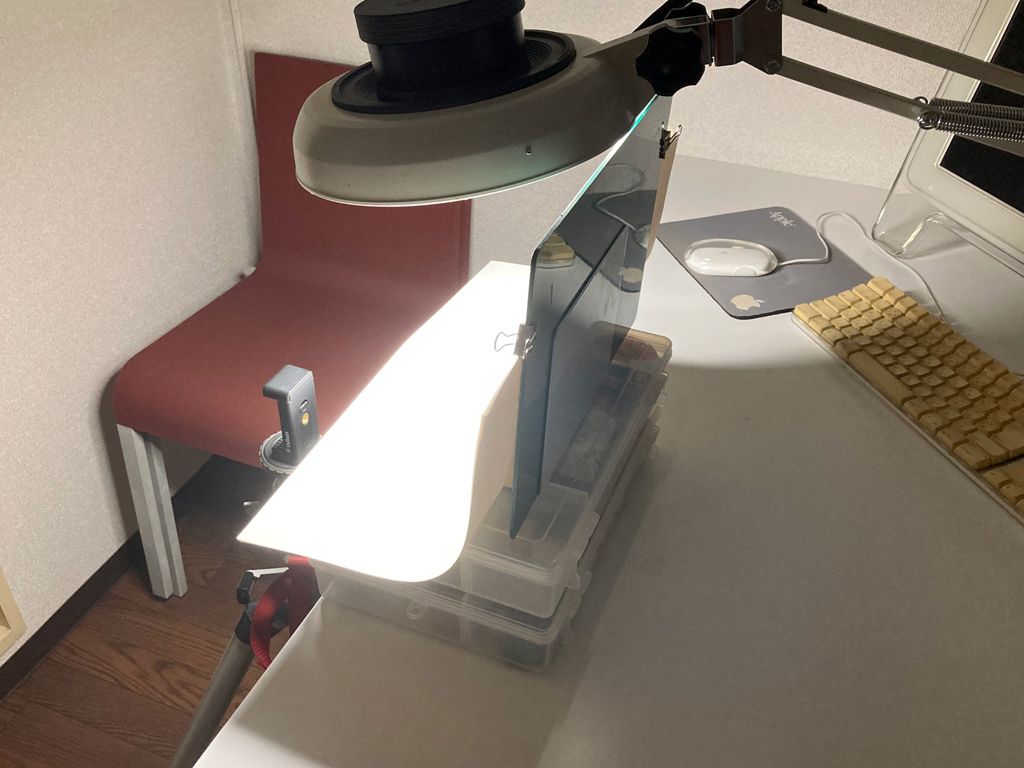
Taking a photo of a finished model is a kind of labor taking work for me; I have to clean up the desk, set the stage, light, tripod, camera, and the model. So, I chose the easiest way as you can see below.
The stage is made of two toolboxes. The horizont is made of the usual cutting board, a bookend, and a sheet of paper. The light attached to the magnifier seems enough for my tiny subject. My white iPhone will also work as a reflector.
The iPhone:
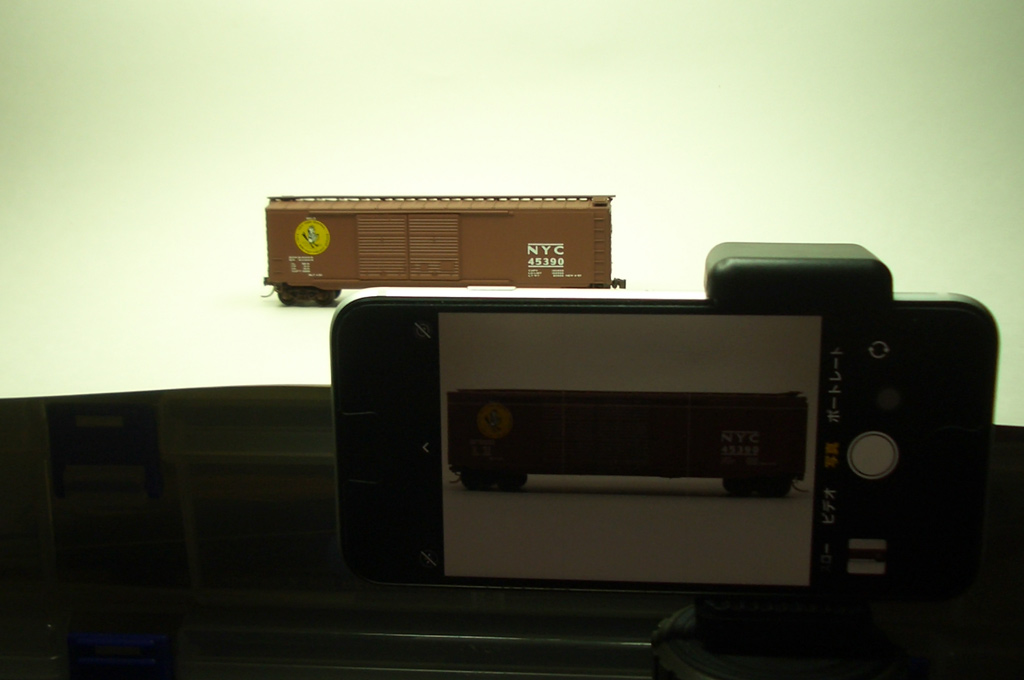
The only drawback to my single-eyed iPhone SE camera is that it doesn’t have optical zoom and the result of the digital zoom is poor in quality. So, I have to draw relatively close to the object not using the zoom using the default Camera app.
However, the shortest focus distance of the iPhone SE camera seems about three inches and a half. Thus, I have to keep at least four inches from the iPhone to the object. Accordingly, the viewpoints are limited. A high-class smartphone with a multi-lenses camera may solve the problem.
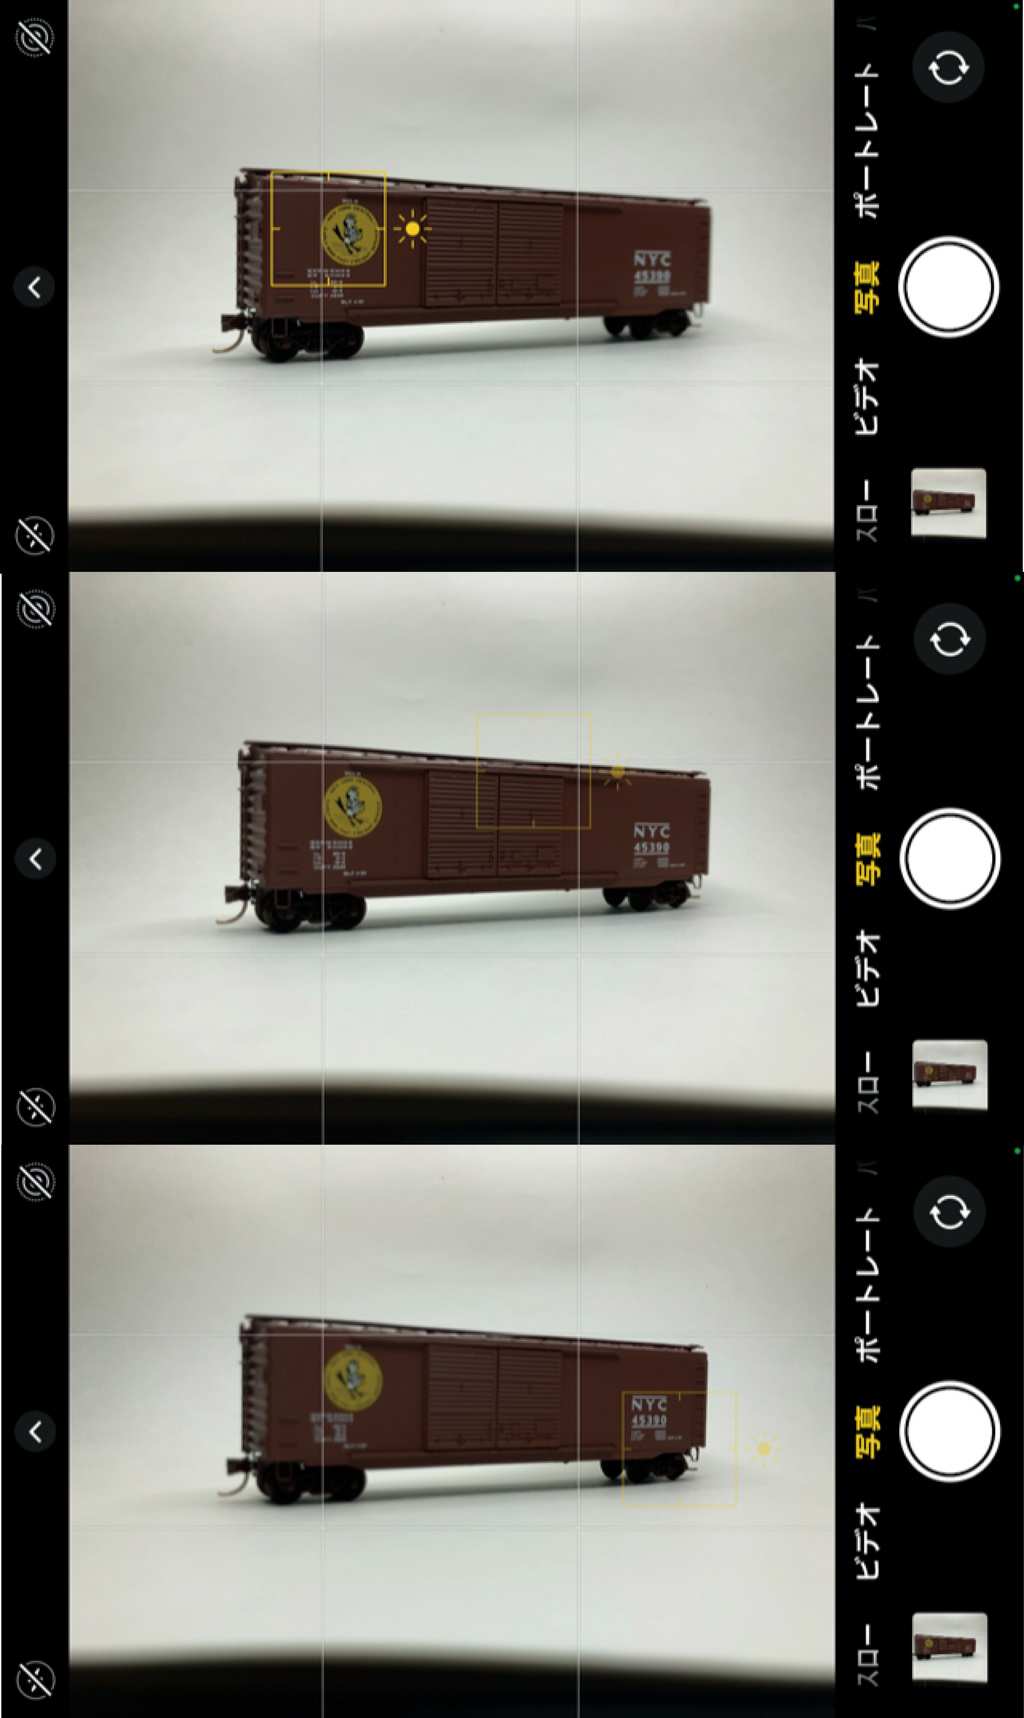
I’m keeping the Smart HDR on. Manually focusing on the iPhone camera is easy. Just tap the display where you want to focus and shoot. Repeat that without moving the object and iPhone, and we can get a series of respectively focused photos. A sample is shown below.
The Photoshop:
A deep focus photo is compounded through stacking several respectively focused photos.
I’m using ten years old Adobe Photoshop CS5 to stack a series of photos. Only two processes are needed to get single deep focus photo from a series of photos; Align and Blend.
Many sites explain the latest how-to. Below is just the memorandum for me and for the guys still using CS5; CS5 related websites are rapidly disappearing these days.
The Procedure:
1: Browse in Bridge

2: Choose Files
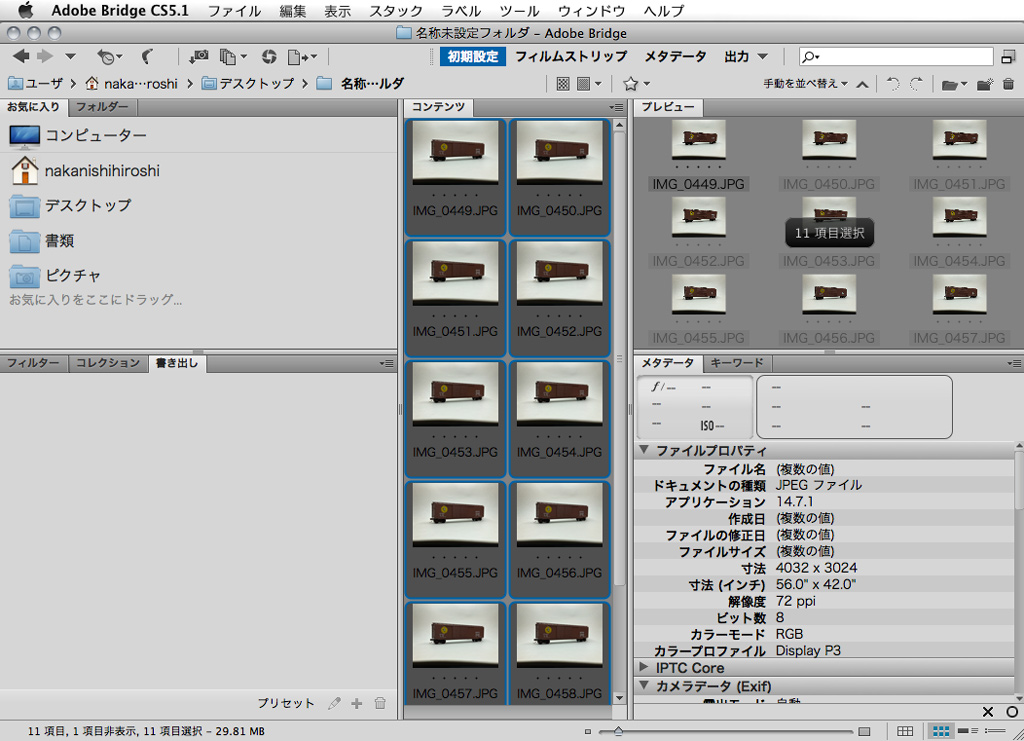
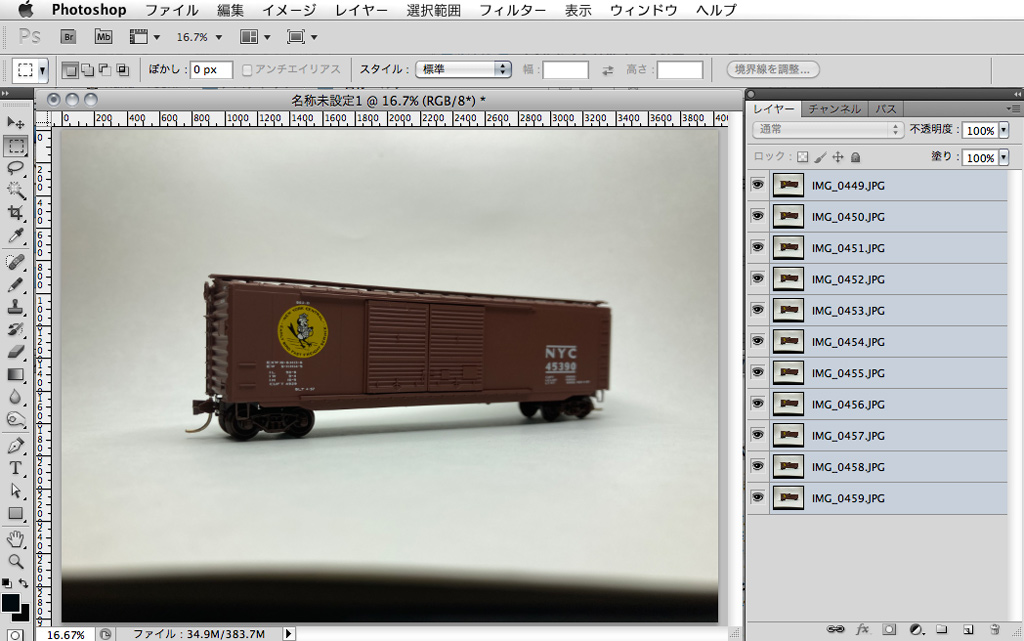
3: Load Files into Stack
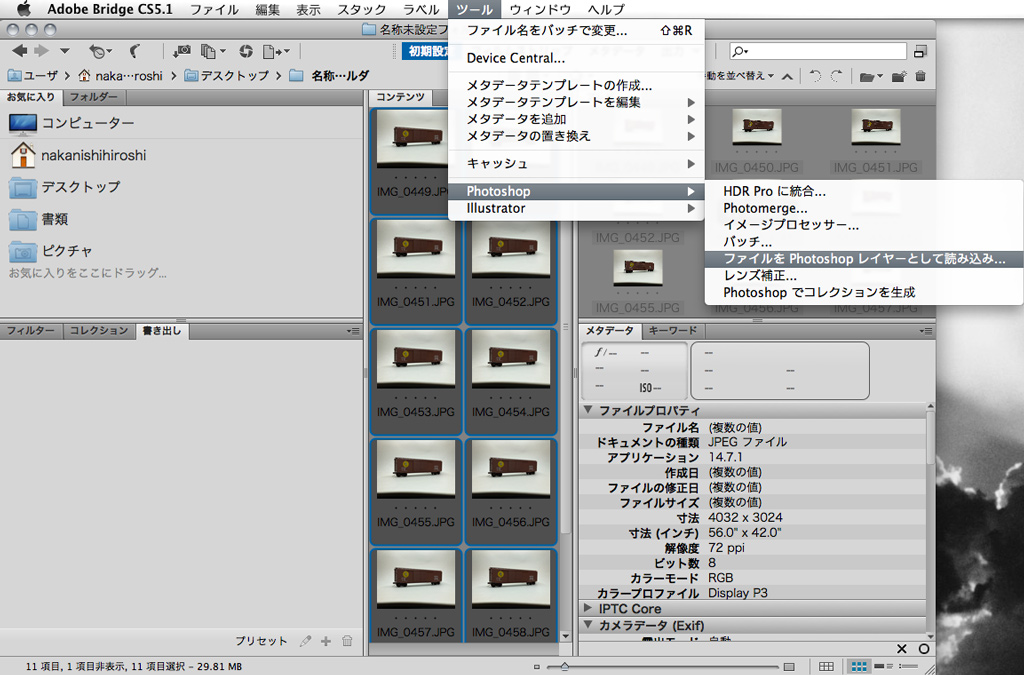
4: Select All the Layers
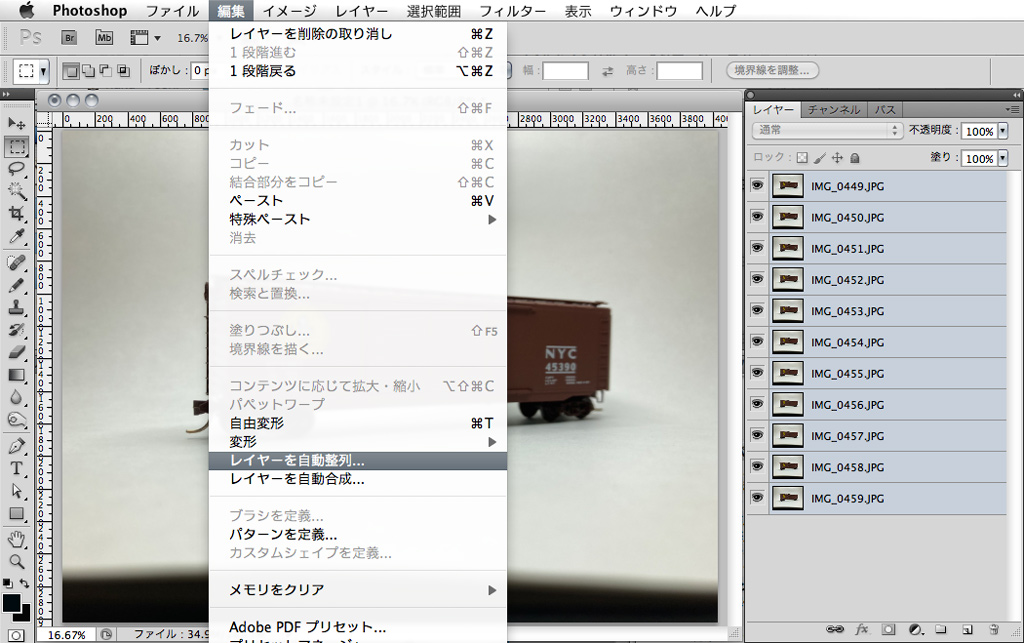
5: Auto-Align Layers
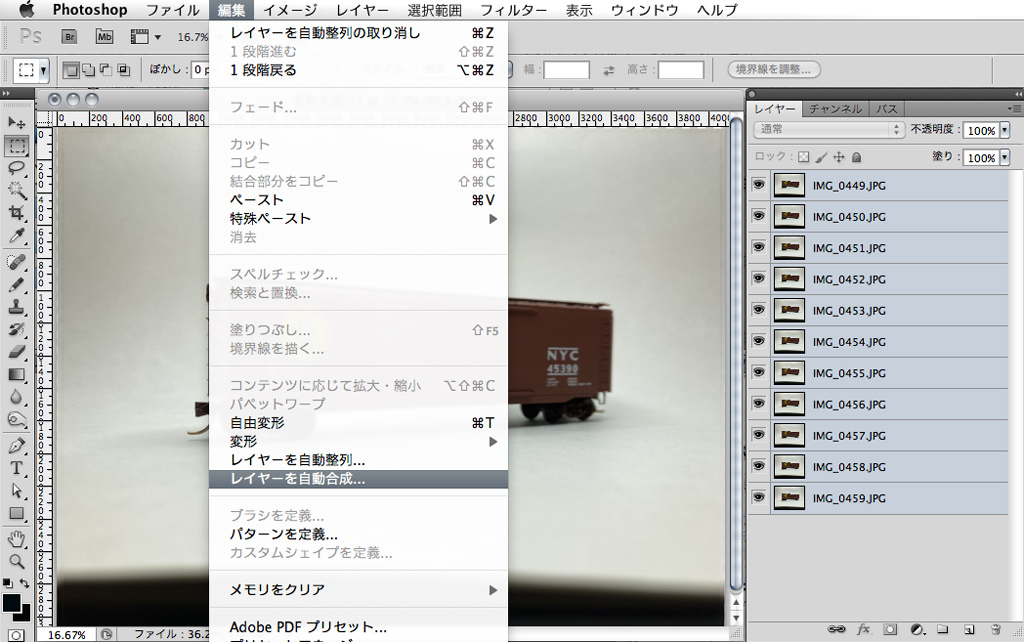
6: Auto-Blend Layers
7: Save and Lens Correction
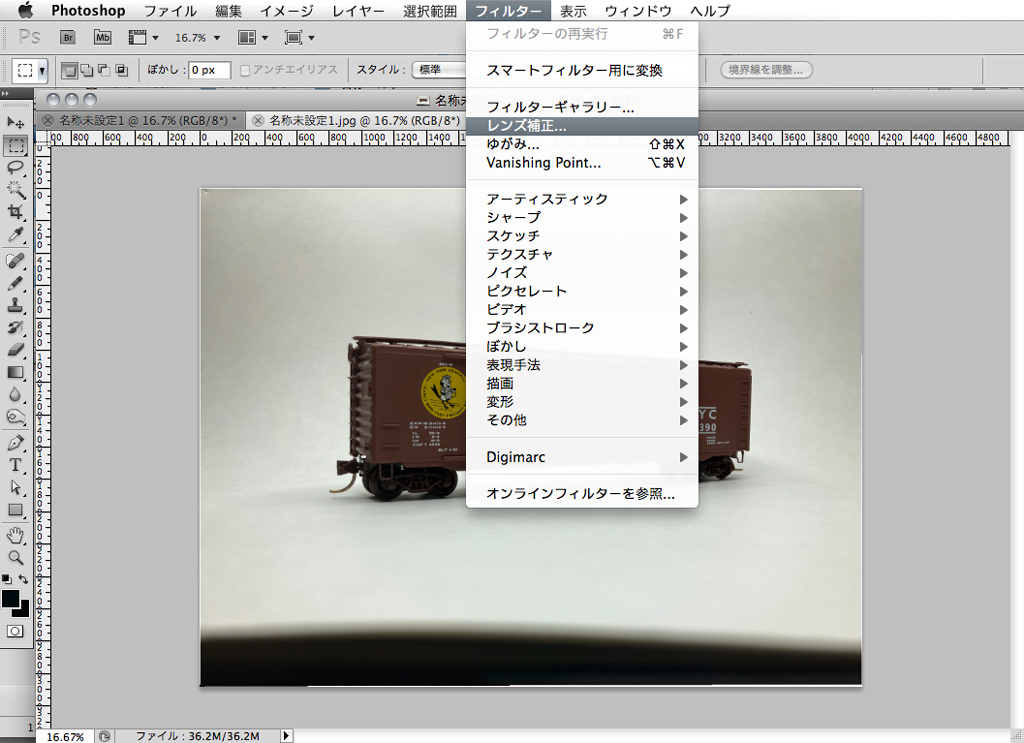
8: Auto Tone and Save for Web
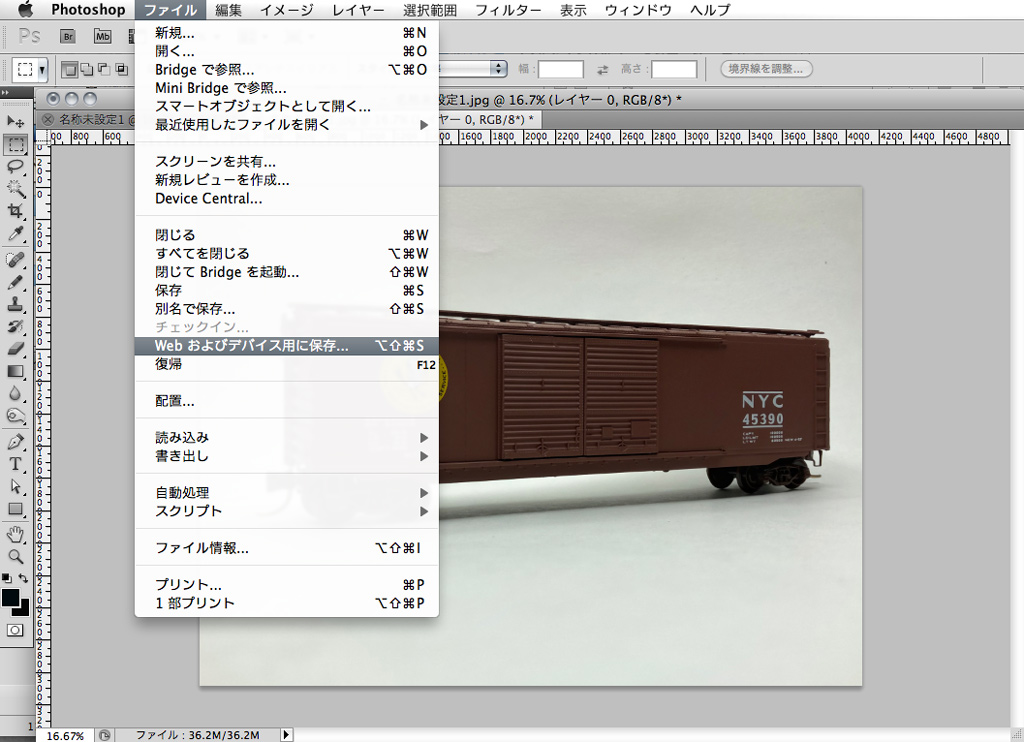
and done!
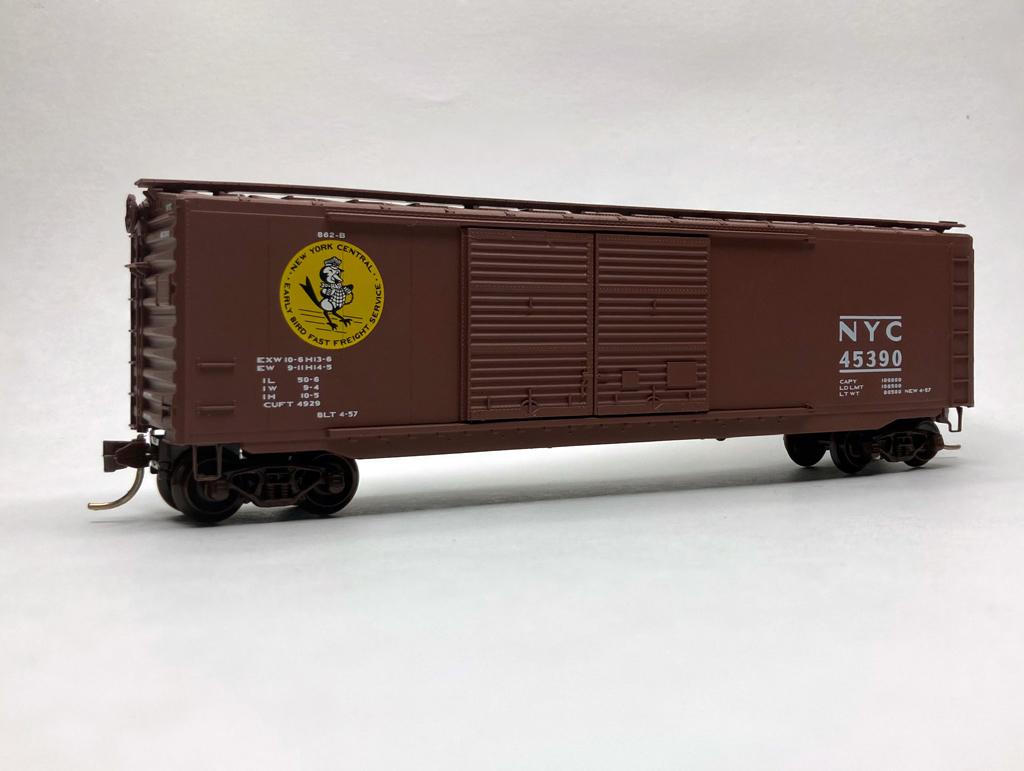 : MTL 034 00 220, NYC#45390
出来上がった模型の写真を撮るのは楽しい、が面倒でもある。特にNスケール模型では被写体が小さいので、通常の機材でパン・フォーカスを得るのは難しい。かつては望遠レンズを用いたり、近くはパソコンで複数画像を合成したり、と、より大きなスケールの模型では必要としない手間がかかる。ここでは、それでもいかにお気楽に模型の写真を撮るか、筆者が試みている方法を紹介する。
まずは、スタジオ・セッティング。もちろんスタジオを常設する場所も金もない。さっきまで店を広げていた工作スペースを片付け、道具箱を重ねてステージとし、カッティング・マットとA3のコピー用紙でホリゾントとする。ライティングは拡大鏡附属の蛍光灯。接写するから、被写体に陰がかからないよう2灯ライティングをするのは難しい。iPhoneの白い筐体はレフ板を兼ねるかも。
単レンズのiPhone SEカメラに光学ズームはなく、デジタルズームは画質が悪く模型写真には使えない。画角は28mm相当だそうだ。デフォルトの「カメラ」アプリを用い、大凡10センチ弱と思われる最短撮影距離を確保しつつ、できるだけ近づいて撮影する。したがって、アングルは限られ選択の余地は少ない。画面ピンチアウトで拡大すると、台車の向きや脱輪、扉の隙間など、肉眼では気付かないこともすぐ分かるので、すかさず直す。露出などを自動調整するHDR機能は、違いがよく分からないのでオンのままにしている。
iPhoneの画面をタップし、ピントを送りながら複数枚の画像を撮影する。それらをパソコンに読み込み、画像加工ソフトで加工してパン・フォーカスの画像を合成する。作例では11枚を合成しているが、多分6枚程度で十分。筆者が用いているAdobe Photoshop CS5というソフトは10年以上前に販売されたもの。最新版でもそれほど違わないと思うが、最近はその教則ウェブページも少なくなってきたので、自分のための健忘禄として手順を記しておく。無料のソフト・アプリもあるようだ。
2021-12-03 09:00
コメント(0)
arx_Ph.D. さん

Here represented are my model railroad enthusiasm generated from the photos I took during my childhood at Knoxville, Tennessee, or from the photos I took during my recent trips.
I'm a retired professor of design, meanwhile a part-time associate at the architectural design office in Osaka, Japan where I live with my wife.


コメント 0