Works - DRGW Wood-side MOW Foreman Office Car X2390 - 01 [Works_MOW Equipment]
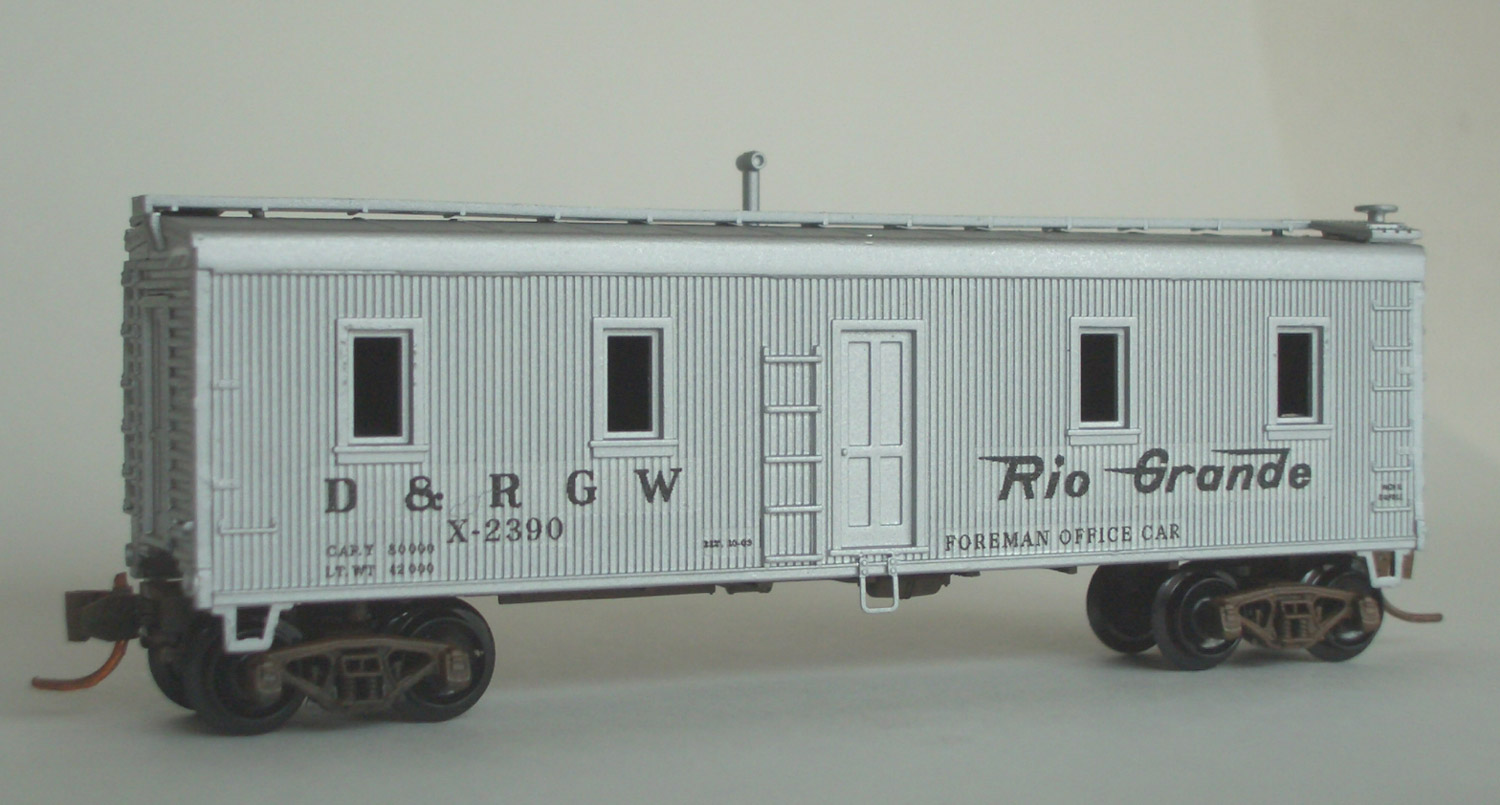 : Rio Grande X2390
I decided to make MOW cars.
I bought "CREW CAR" kits from TICHY TRAIN GROUP. After receiving the kits, I found out that I needed 7/8 rib ends to make Rio Grande MOW cars shown in the MSCG, as the kits had wood ends. I imported 2 cars, Atlas USRA Single Sheathed Box Cars #41700, to obtain them.
Works - DRGW Wood-side MOW Foreman Office Car X2390 - 02 [Works_MOW Equipment]
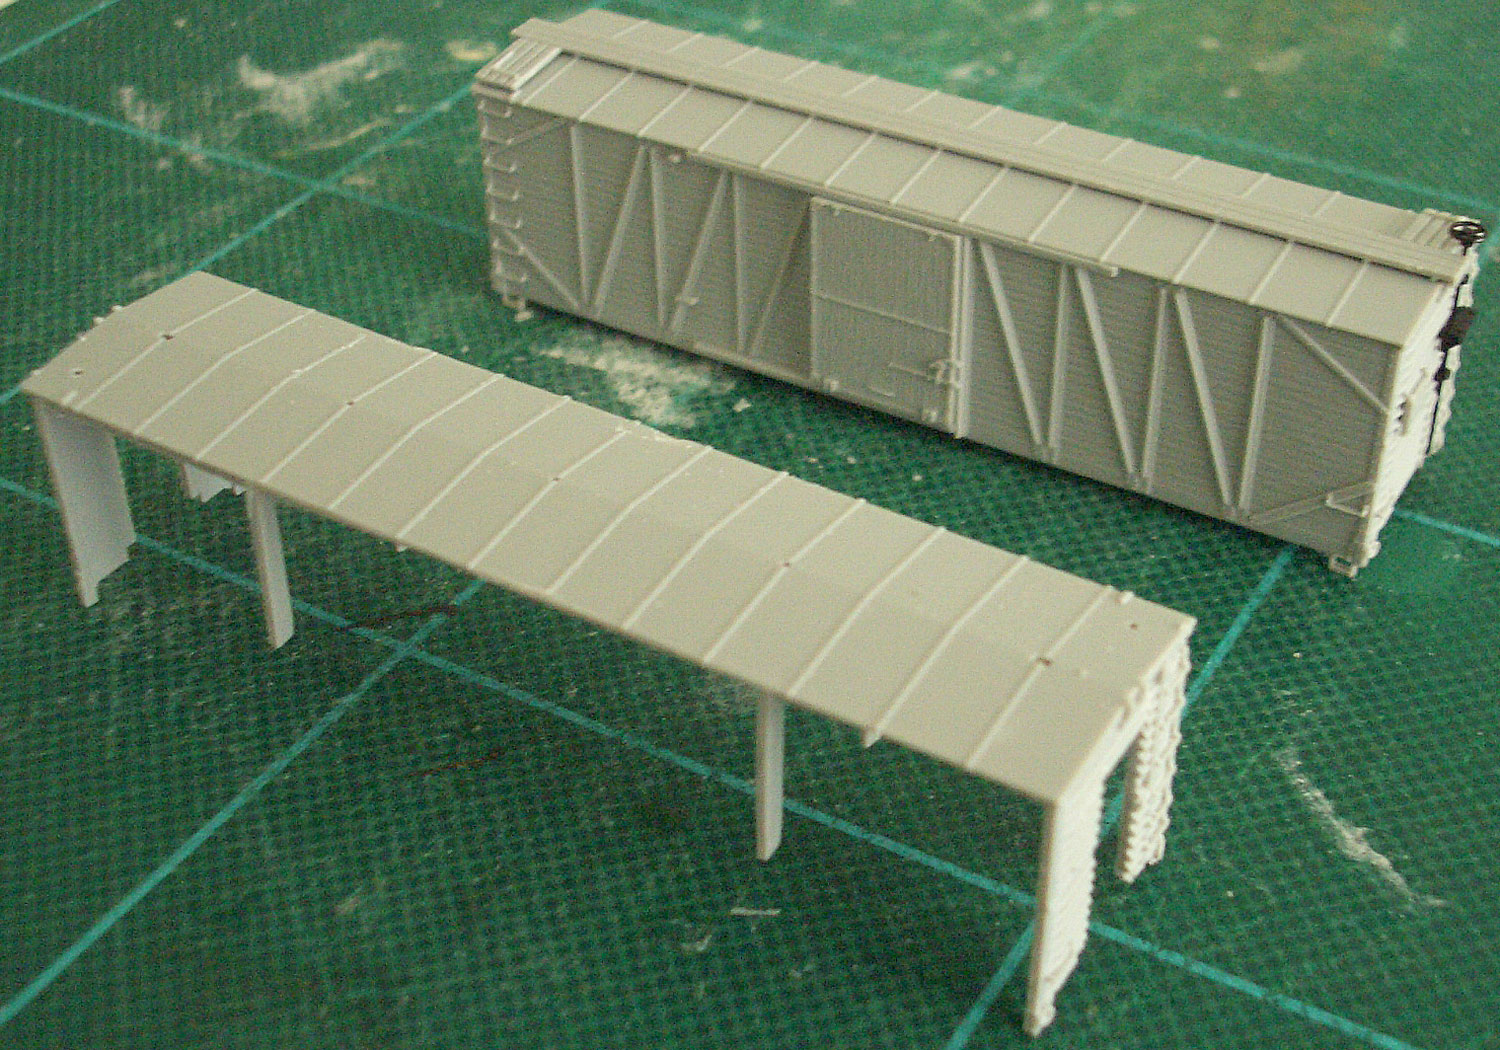 : before and after
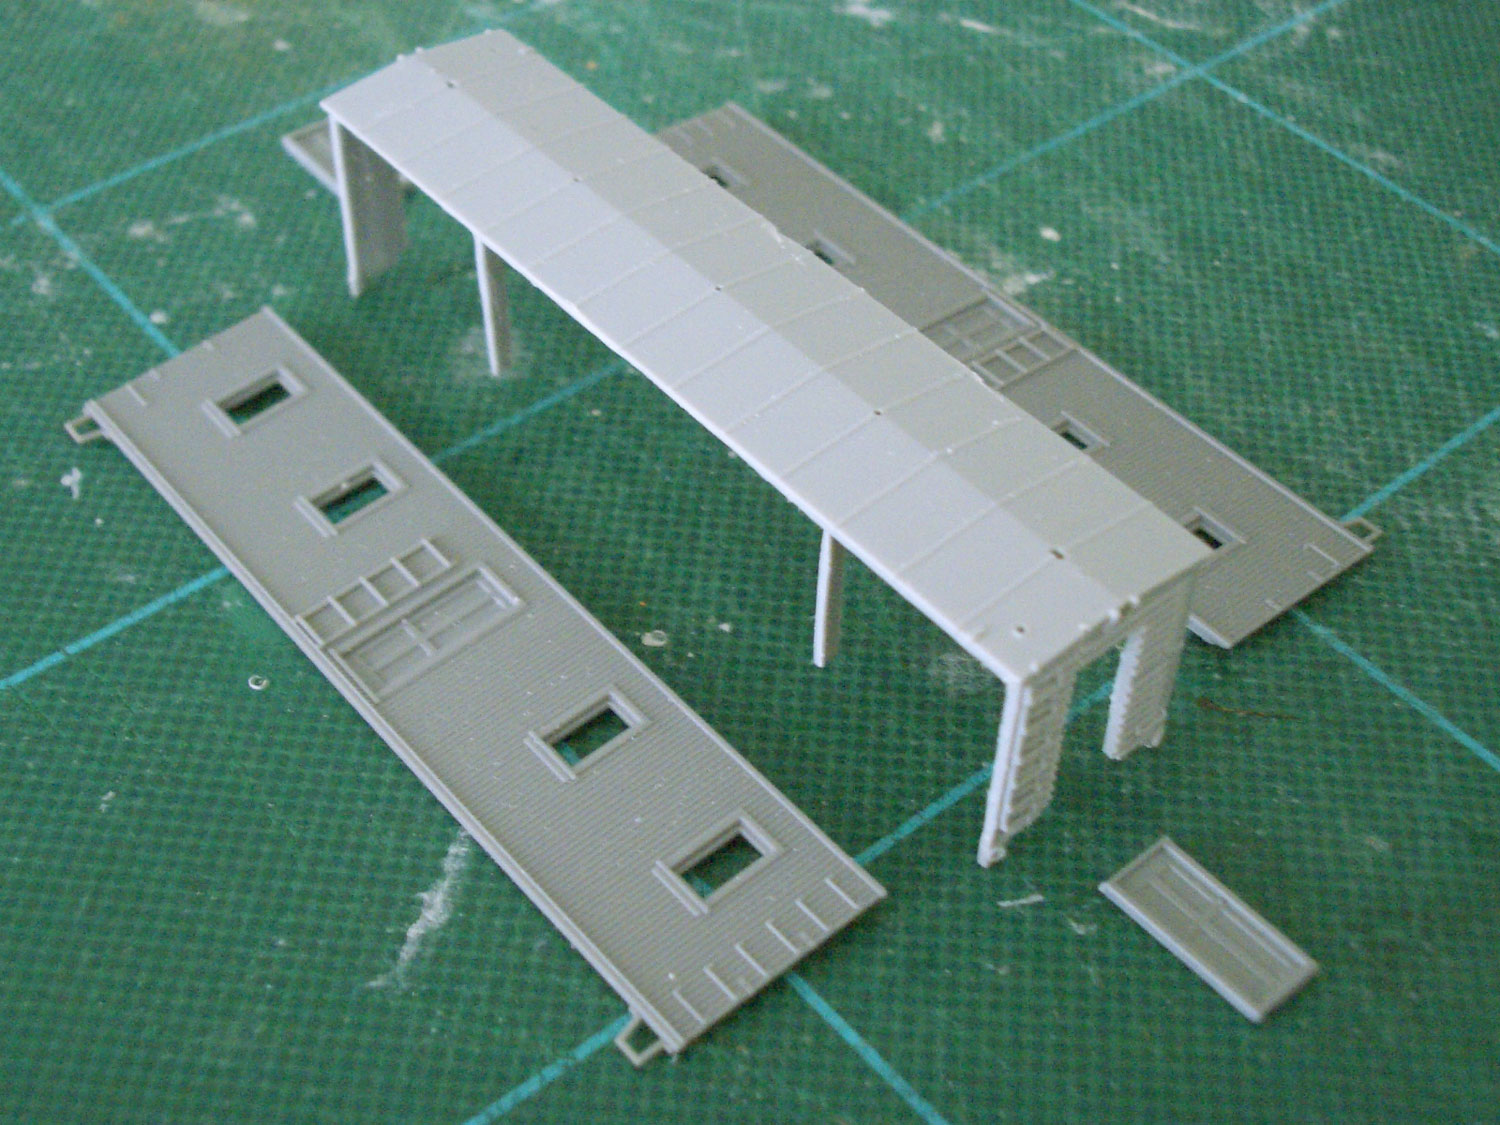 : transplanting
I cut off the Atlas' sides leaving the ribs for the convenience of later transplanting. The doors on ends were cut from TICHY's parts.
TICHY's side parts were a little low. So I filled the space with a thin brass plate to simulate the wrapped down roof. The ladders not existing on the Rio Grande cars were left because of its difficulty to shaving off.
Other parts used are;
BLMA #402 Freight Car Stirrups
MICRO-TRAINS #003 02 021 BETTENDORF TRUCKS w/couplers
After spraying silver, I finished the car with self-made decal.
Works - DRGW Wood-side MOW Foreman Office Car X2390 - 03 [Works_MOW Equipment]
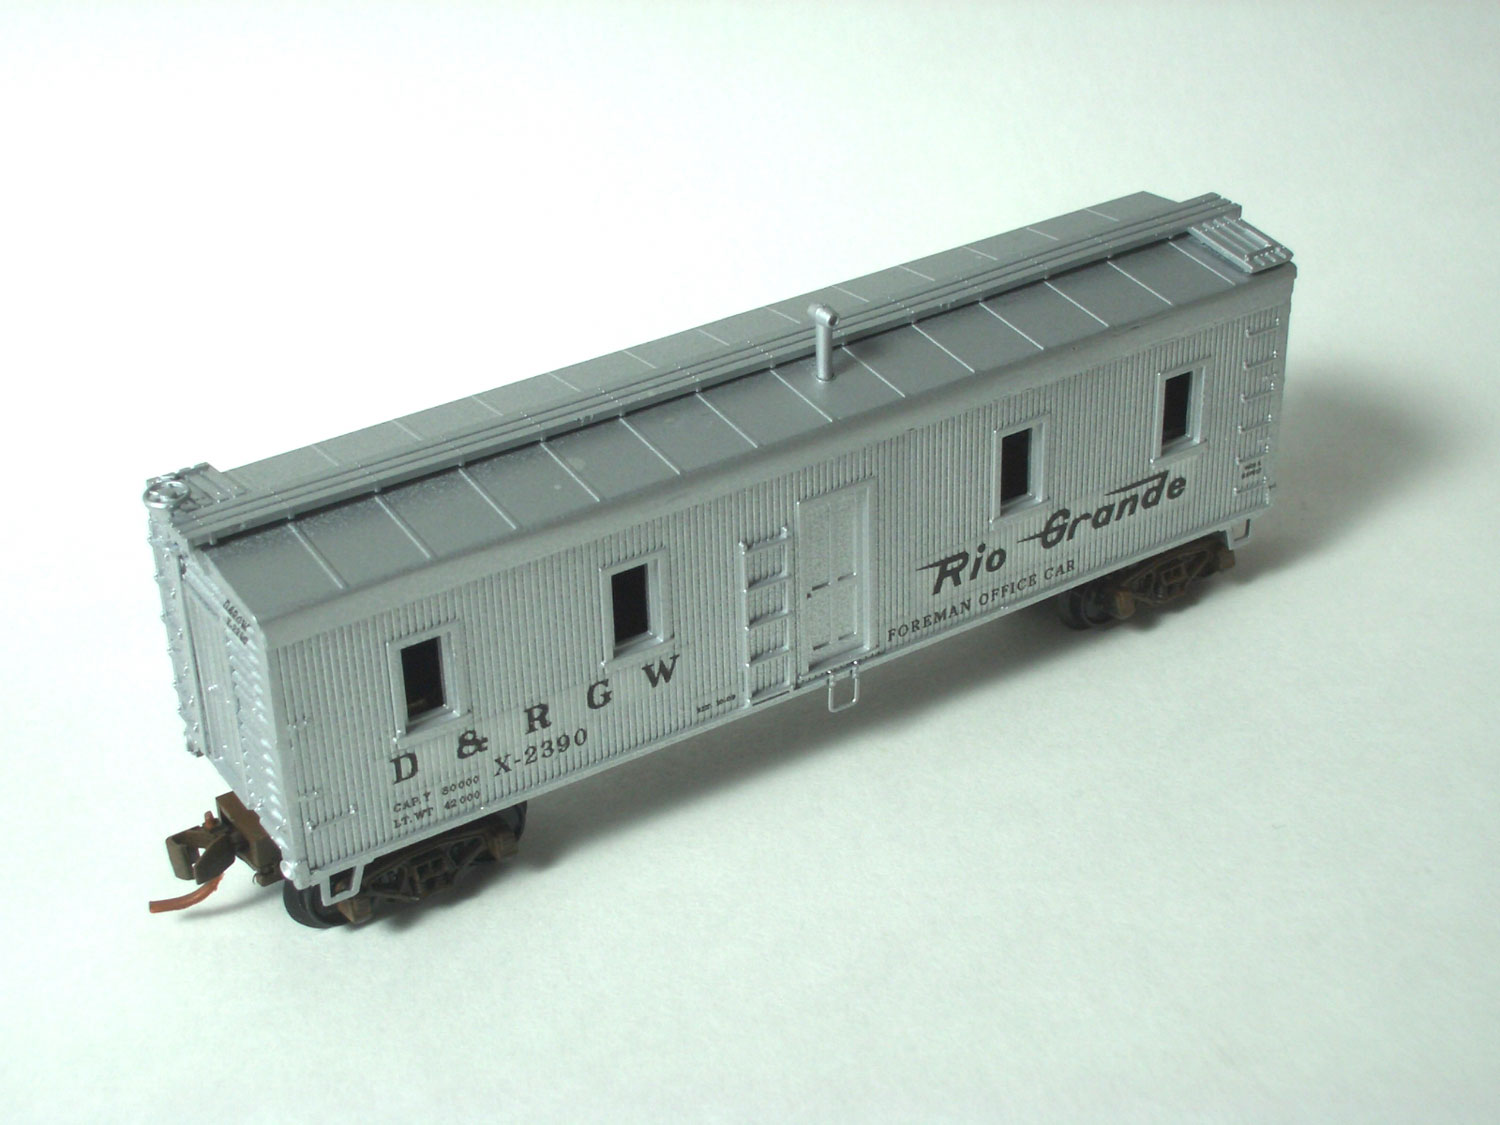 : DRGW X2390
DRGW X2384 - 2391 series MOW Foreman Office Cars:
According to the MSCG, The series X2384 - 2391were rebuilt from 62000 - 63499 series 36' double sheathed boxcars built in 1909. MSCG has a 1977 photo of freshly repainted X2391. But the official Jan. 1971 Summary of Equipment lists series X2378 - 2411 as Foreman Office Cars.
Works - DRGW Wood-side MOW Sleeper X2381 - 01 [Works_MOW Equipment]
 : Rio Grande X2381
Here I show another version of kitbashing.
This time I filled the space caused by the shortage of the height of the TICHY sides at the sill.
I used EVERGREEN I-BEAM #272 to represent the flame under the siding. Rivets on the flame were made of ARCHER decal #AR88024.
Other parts I used are;
BLMA #402 Freight Car Stirrups
MICRO-TRAINS #499 57 905 Caboose Smoke Stacks
MICRO-TRAINS #003 02 021 BETTENDORF TRUCKS w/couplers
After spraying silver, I finished the car with self-made decal.
ARCHER surface detail;
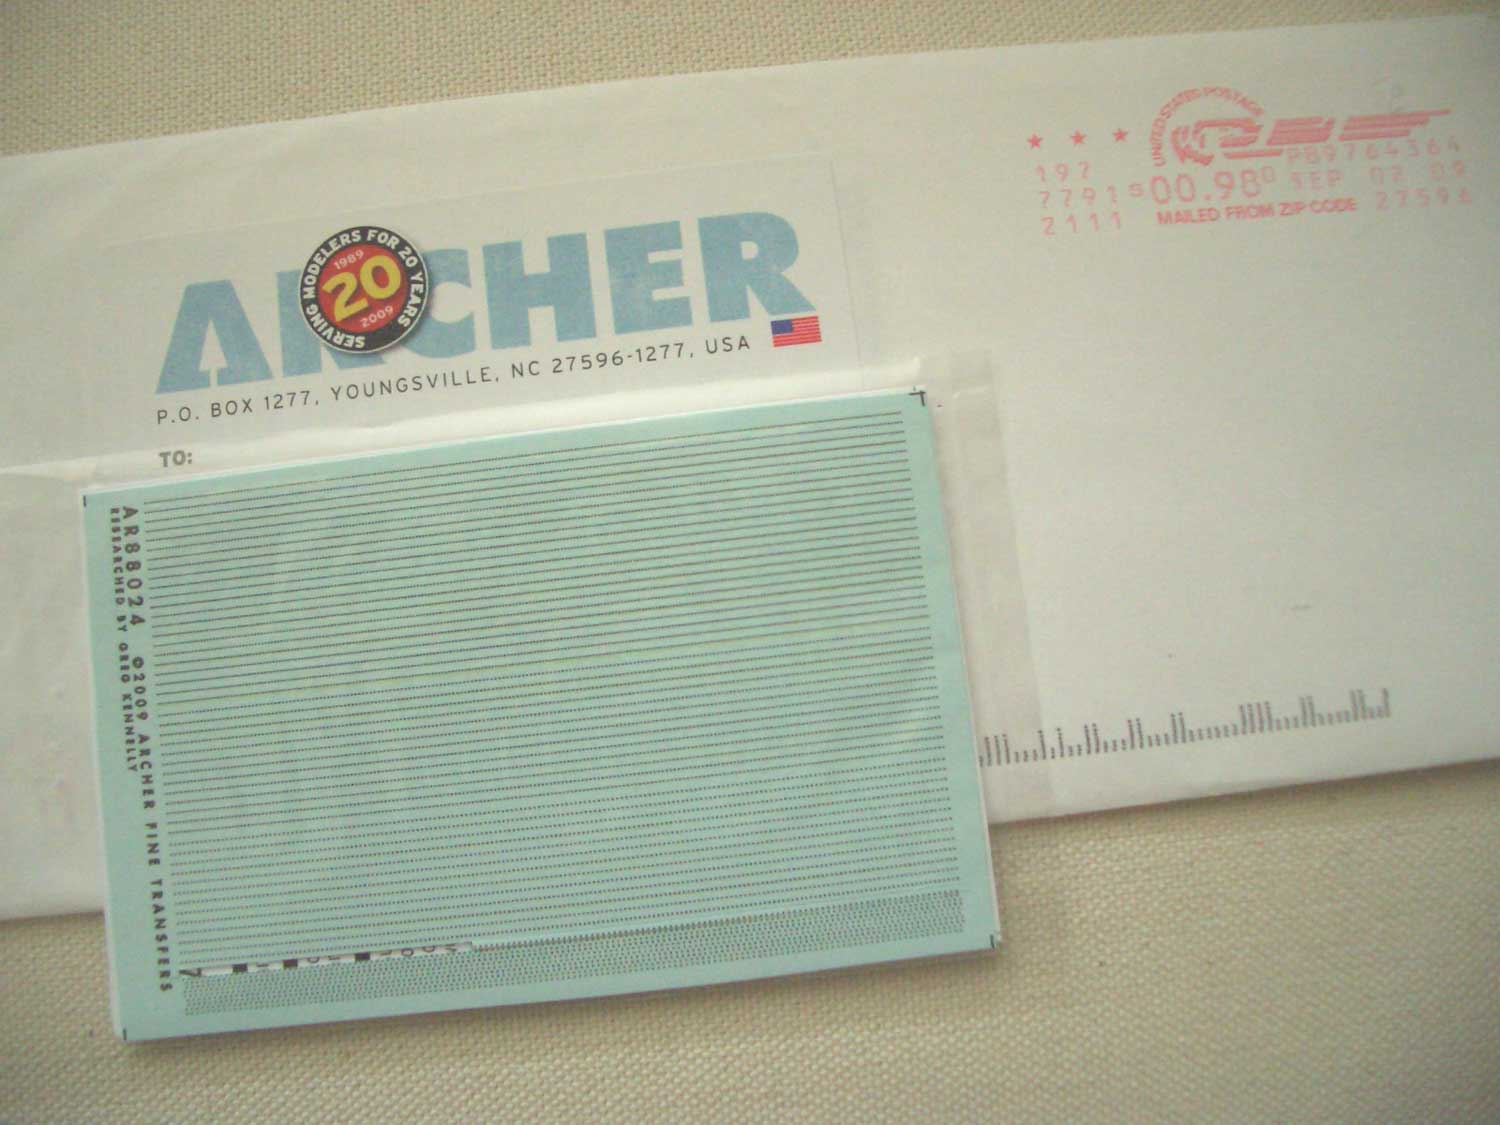 : Archer Rivets Decal
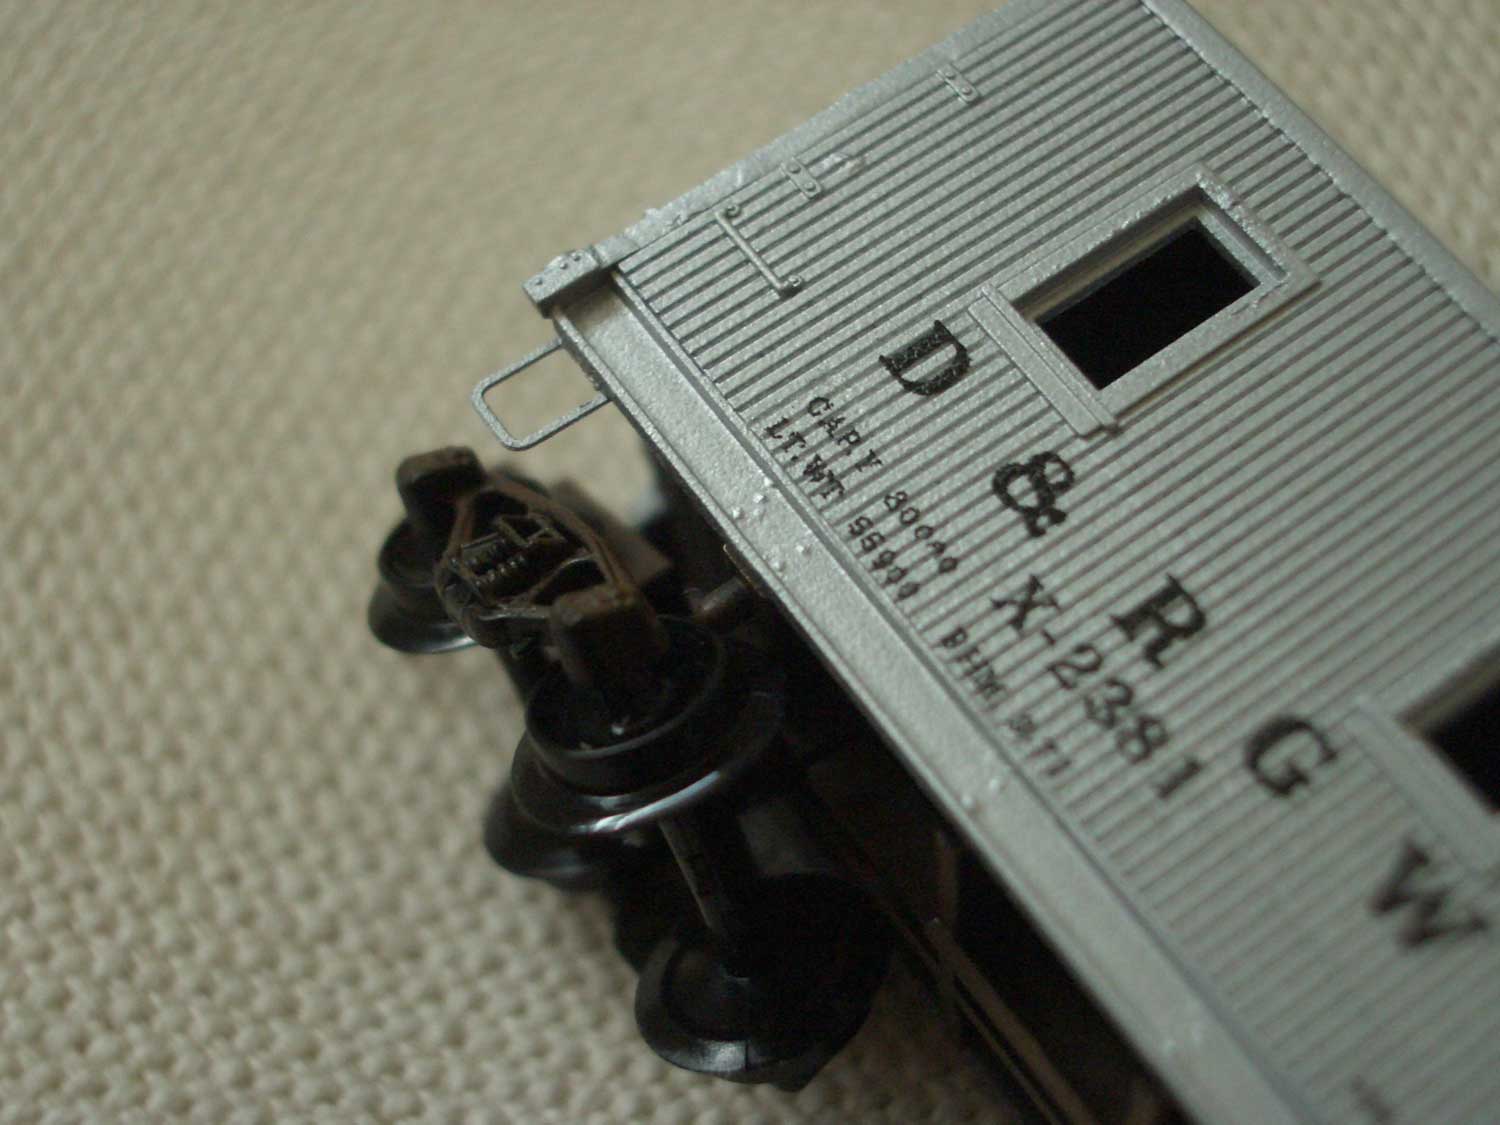 : applied Archer Rivets Decal
Works - DRGW Wood-side MOW Sleeper X2381 - 02 [Works_MOW Equipment]
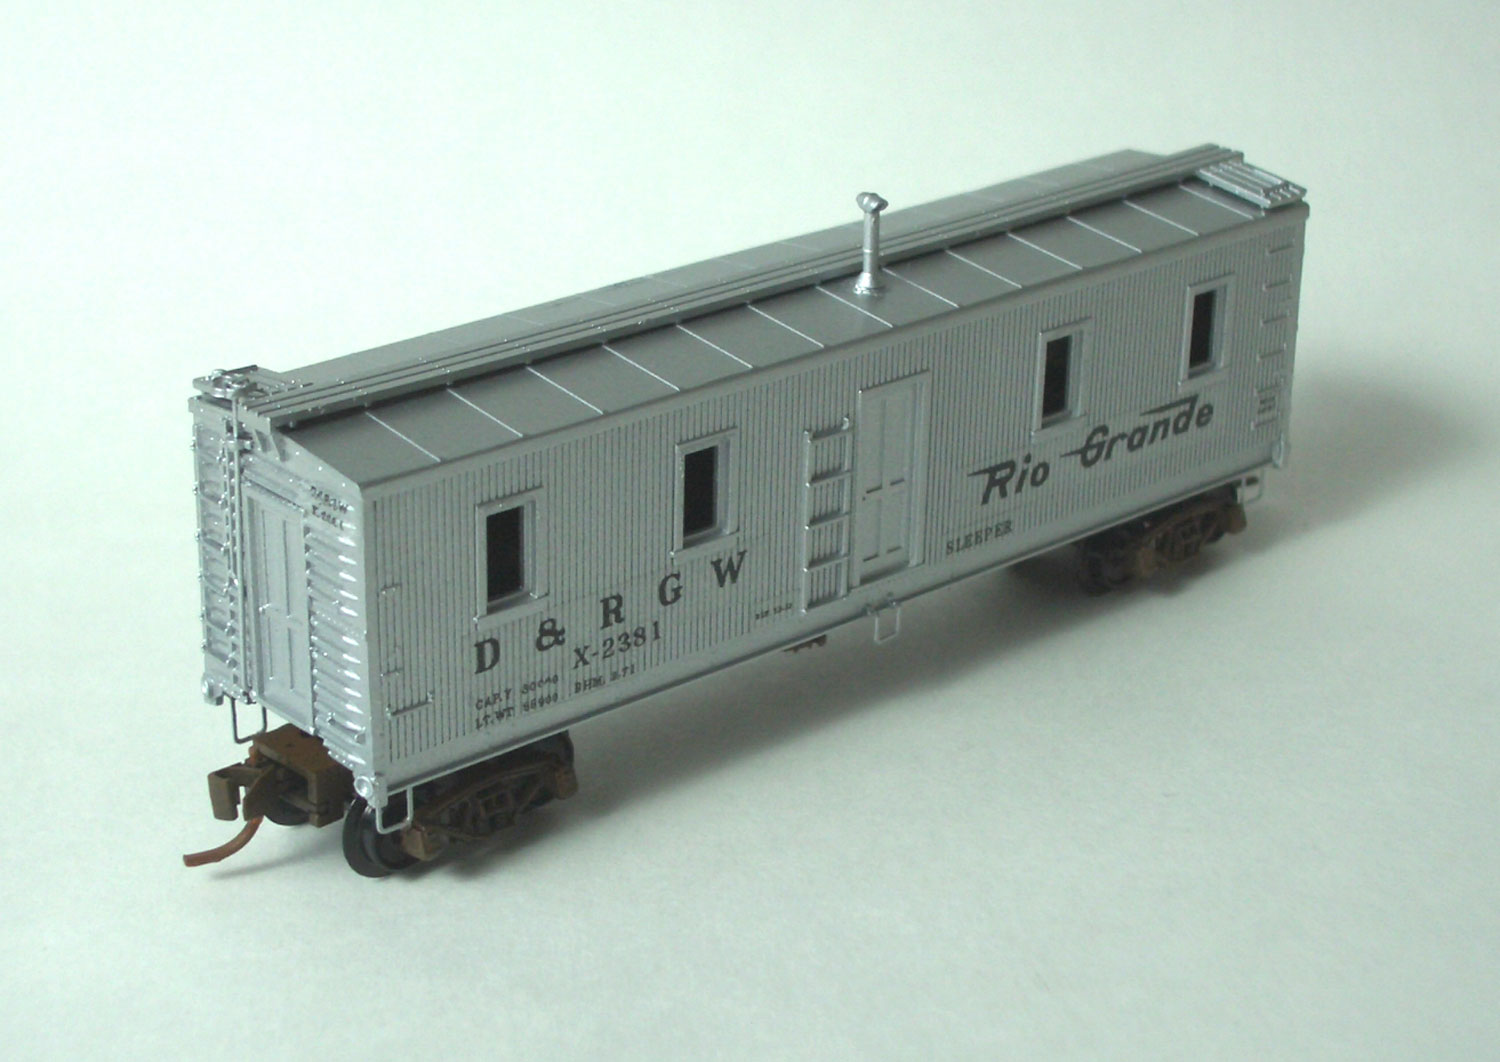 : DRGW X2381
DRGW X2375 - 2383 series Track Gang Sleepers:
According to the MSCG, The series X2375 - 2383 were rebuilt from 63500 - 64199 series 36' double sheathed boxcars built in 1913. MSCG has a 1977 photo of freshly repainted X2382. But the official Jan. 1971 Summary of Equipment does not list this series; sleepers are in series X2011 - 2071.
I came to find similar equipment at Glendive MT in 1971.
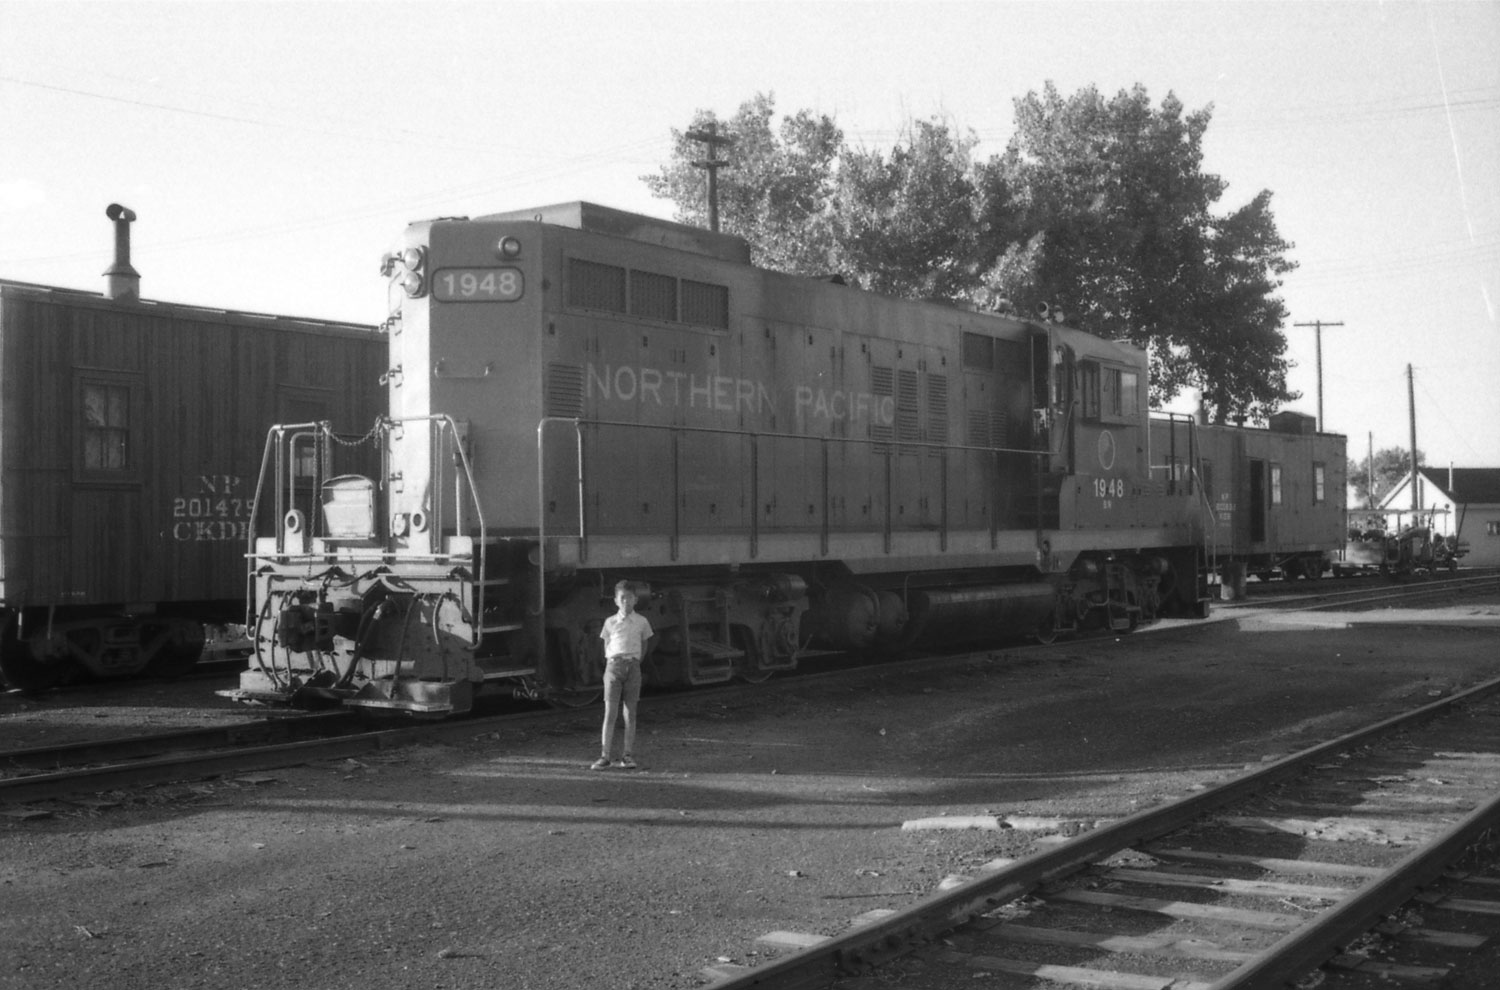 : Glendive MT, summer, 1971
Works - DRGW MOW Water Car X2915 - 01 [Works_MOW Equipment]
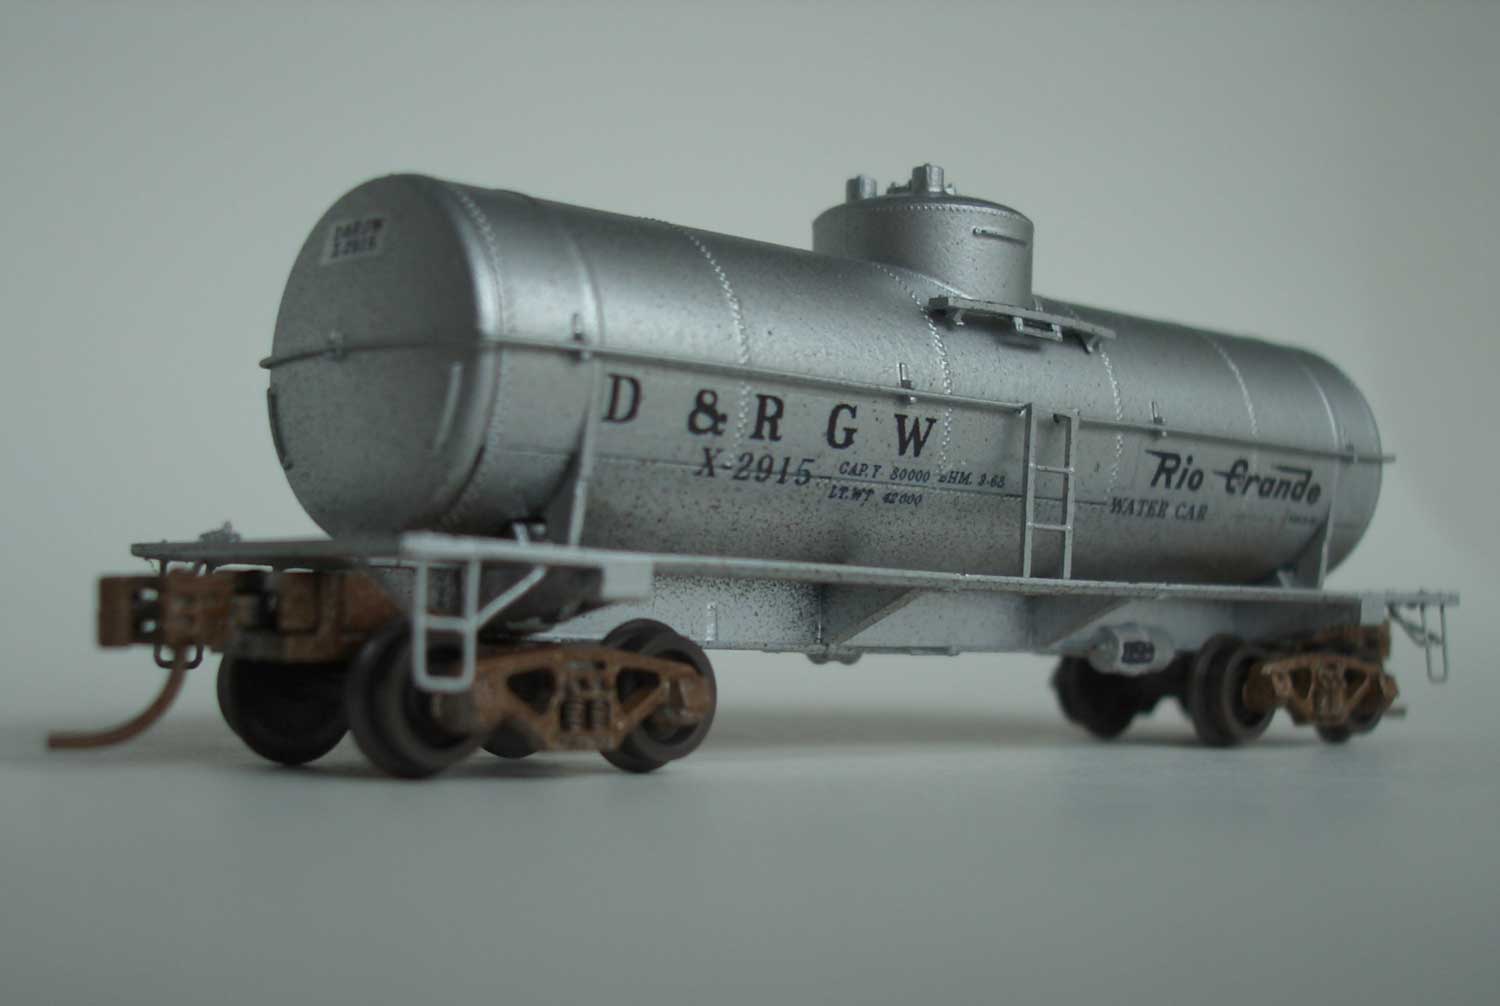
 : Rio Grande X2915
I know MTL produced a model of Rio Grande MOW Water Car. But it is an expensive and rare Collector's Item. So I decided to make my own.
I found the clear and big enough color photo of X-2915 at the Fallen Flag site. So I decided to make the exact car. I used MTL undecorated 39' Single dome Tank Car for the base.
The parts I used are;
BLMA #402 Freight Car Stirrups
Archer #29 Offset Tank Car double row rivets
Athern Bettendorf Trucks (surplus from the open hopper car)
Prototype photo of D&RGW X-2915 at Fallen Flags page;
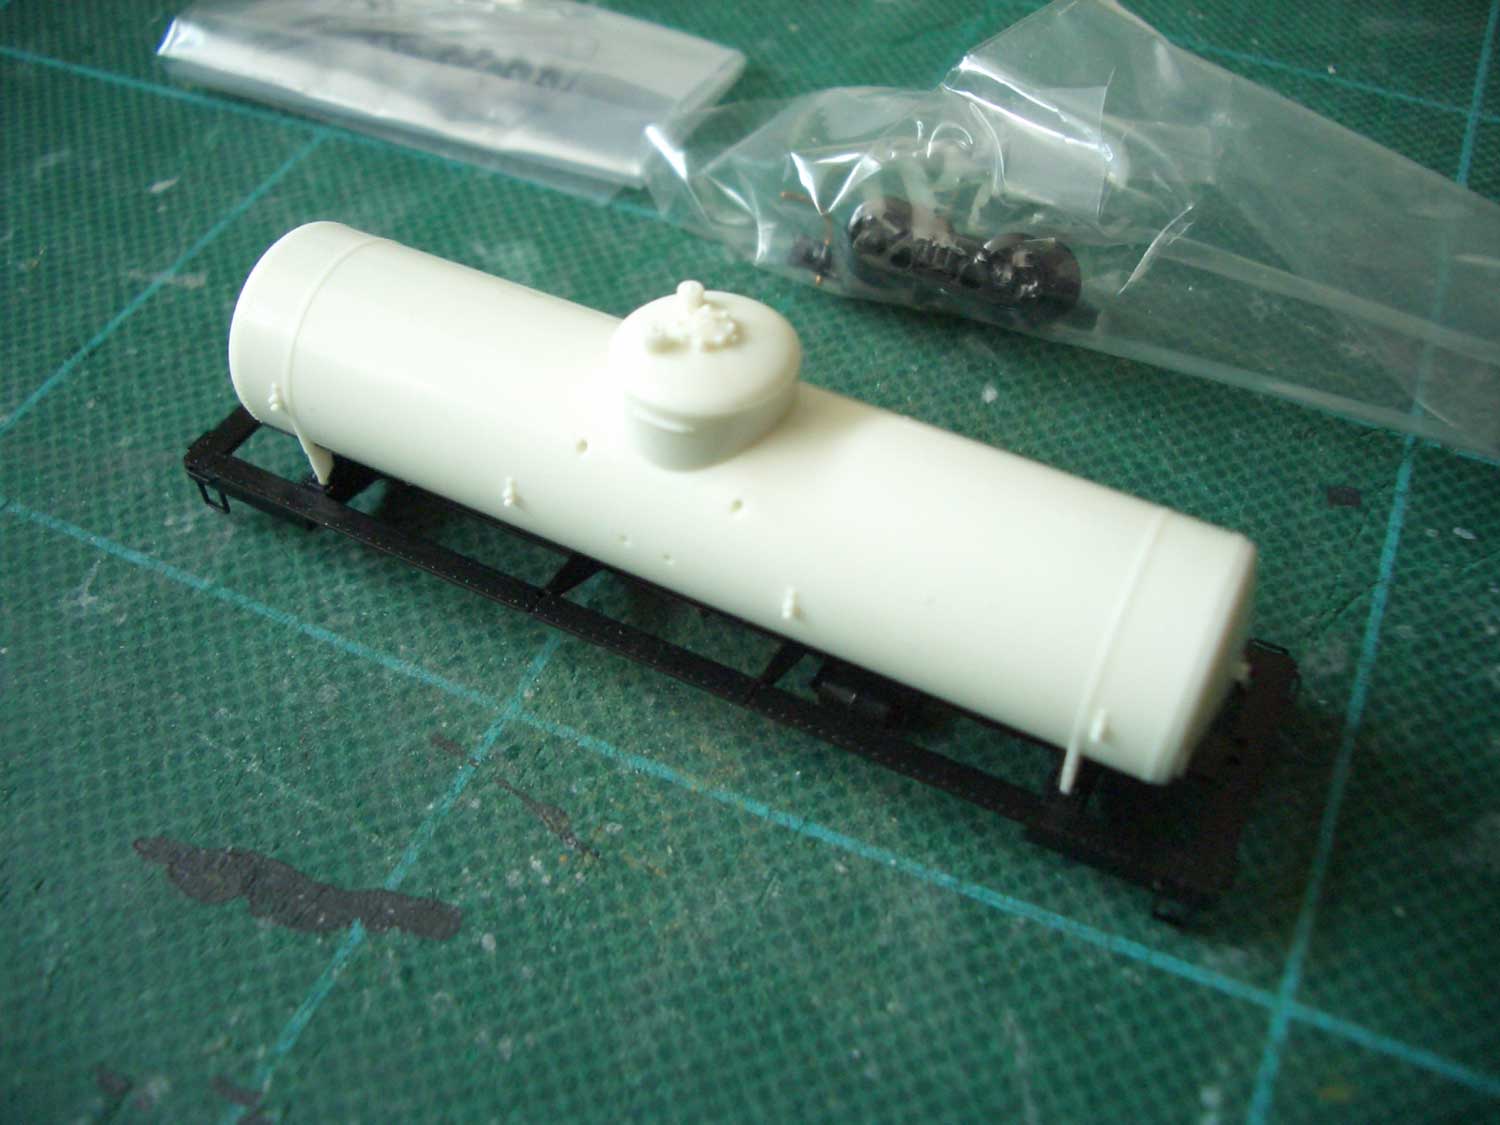 : the MTL undec car as out of box
Works - DRGW MOW Water Car X2915 - 02 [Works_MOW Equipment]
 : stripped end sill and applied stirrups
I started with stripping off the end sill, together with the stirrups. I added the new stirrups using the D type parts from BLMA with brass rod to represent the stay. A guide plate was required for me to bore the 16 holes just next to the edge of the sill.
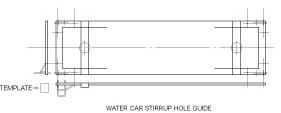 : drawing for the water car stirrups
 : BLMA parts I used
Works - DRGW MOW Water Car X2915 - 03 [Works_MOW Equipment]
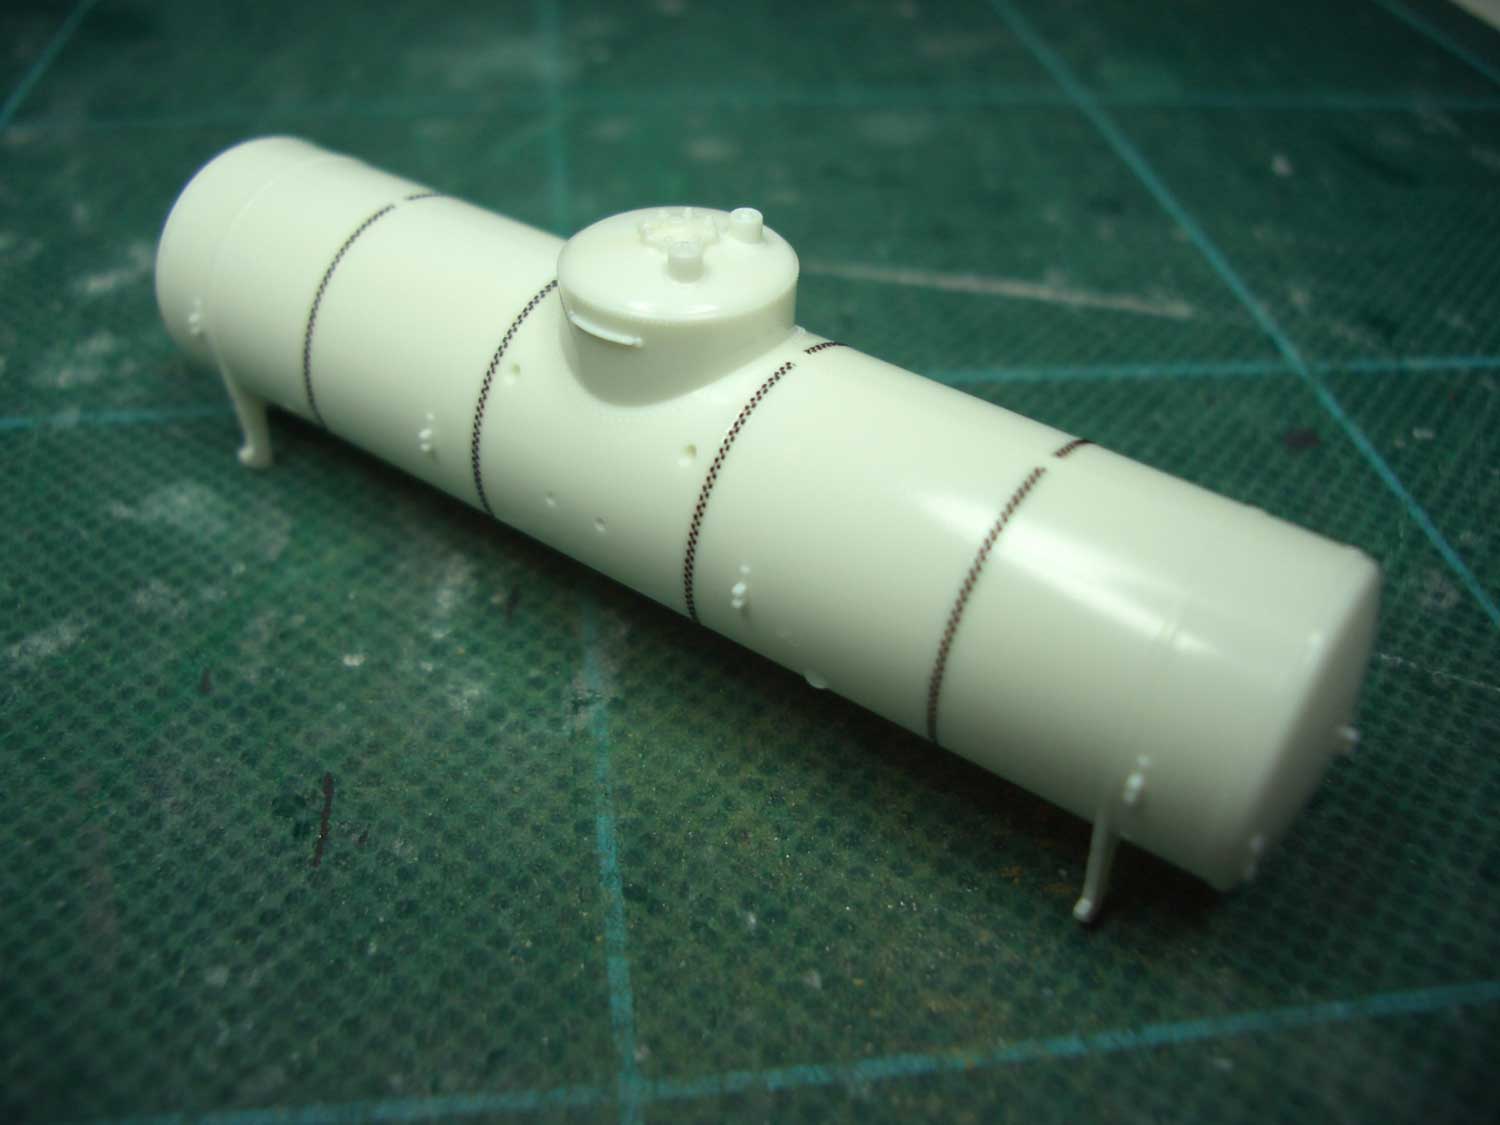 : rivets applied tank body
I applied 4 rows of rivets using Archer decal. The ends and horizontal row of rivets are of MTL original. I used the surfacer to protect the rivet decal, as I wanted to apply the rivet decal without conflicting with handrails and walks.
After the surfacer was dried, I applied the detail parts. I cut the ladders over the handrail according to the prototype. Please don't claim about the position of the reservoir. I washed the car carefully not to peal off the rivets and sprayed the surfacer again.
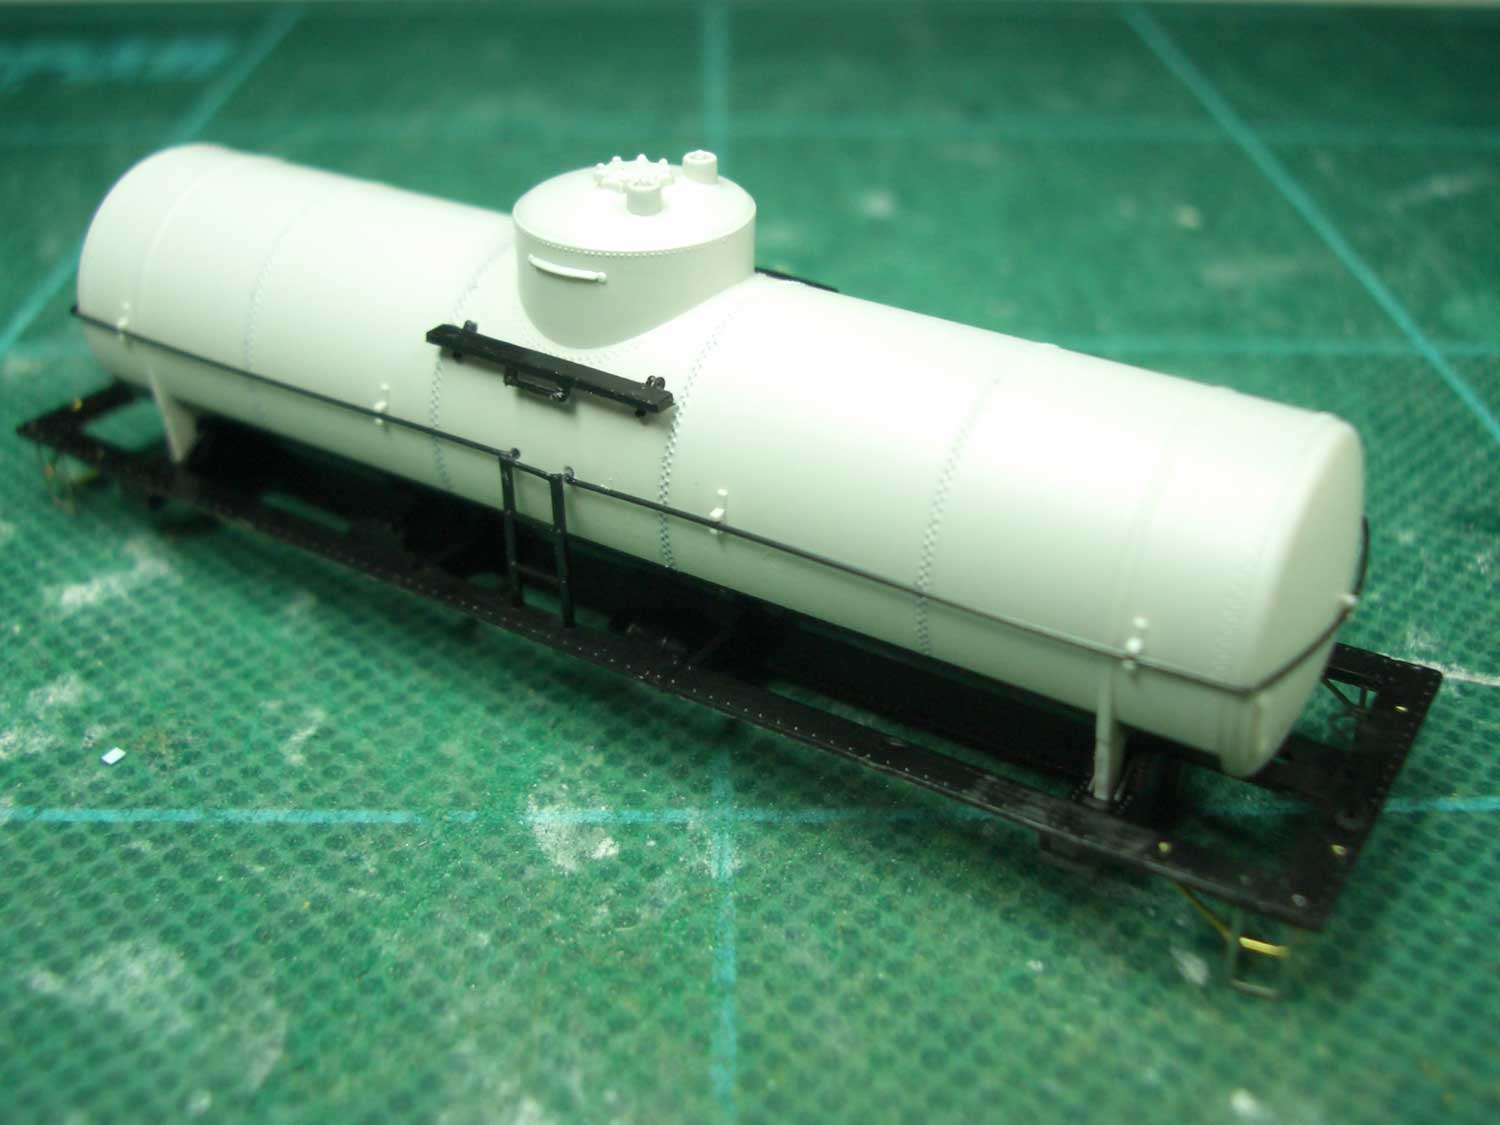 : detail parts applied tank body
Works - DRGW MOW Water Car X2915 - 04 [Works_MOW Equipment]
 : DRGW X2915
After spraying silver, I finished the car with self-made decal.
I make the decal with an ink-jet printer. In this way, we have to coat the surface, not to wash out the water-soluble letters. That makes us difficult to hide the edge of the film.
I knew the small piece of cut decal floats on the water. So, I tried to apply without coating this time; Floating on the water, Sliding carefully with a dry toothpick, Not to wet the surface. The result looks better, I think.
DRGW X2900 - X2946 series Water Cars (Tank):
According to the MSCG, X2905 was built in 1919. But the prototype photo of X2915 shows a little deference from X2905 shown in MSCG. But Jan 1971 Summary of Equipment lists them in one series.
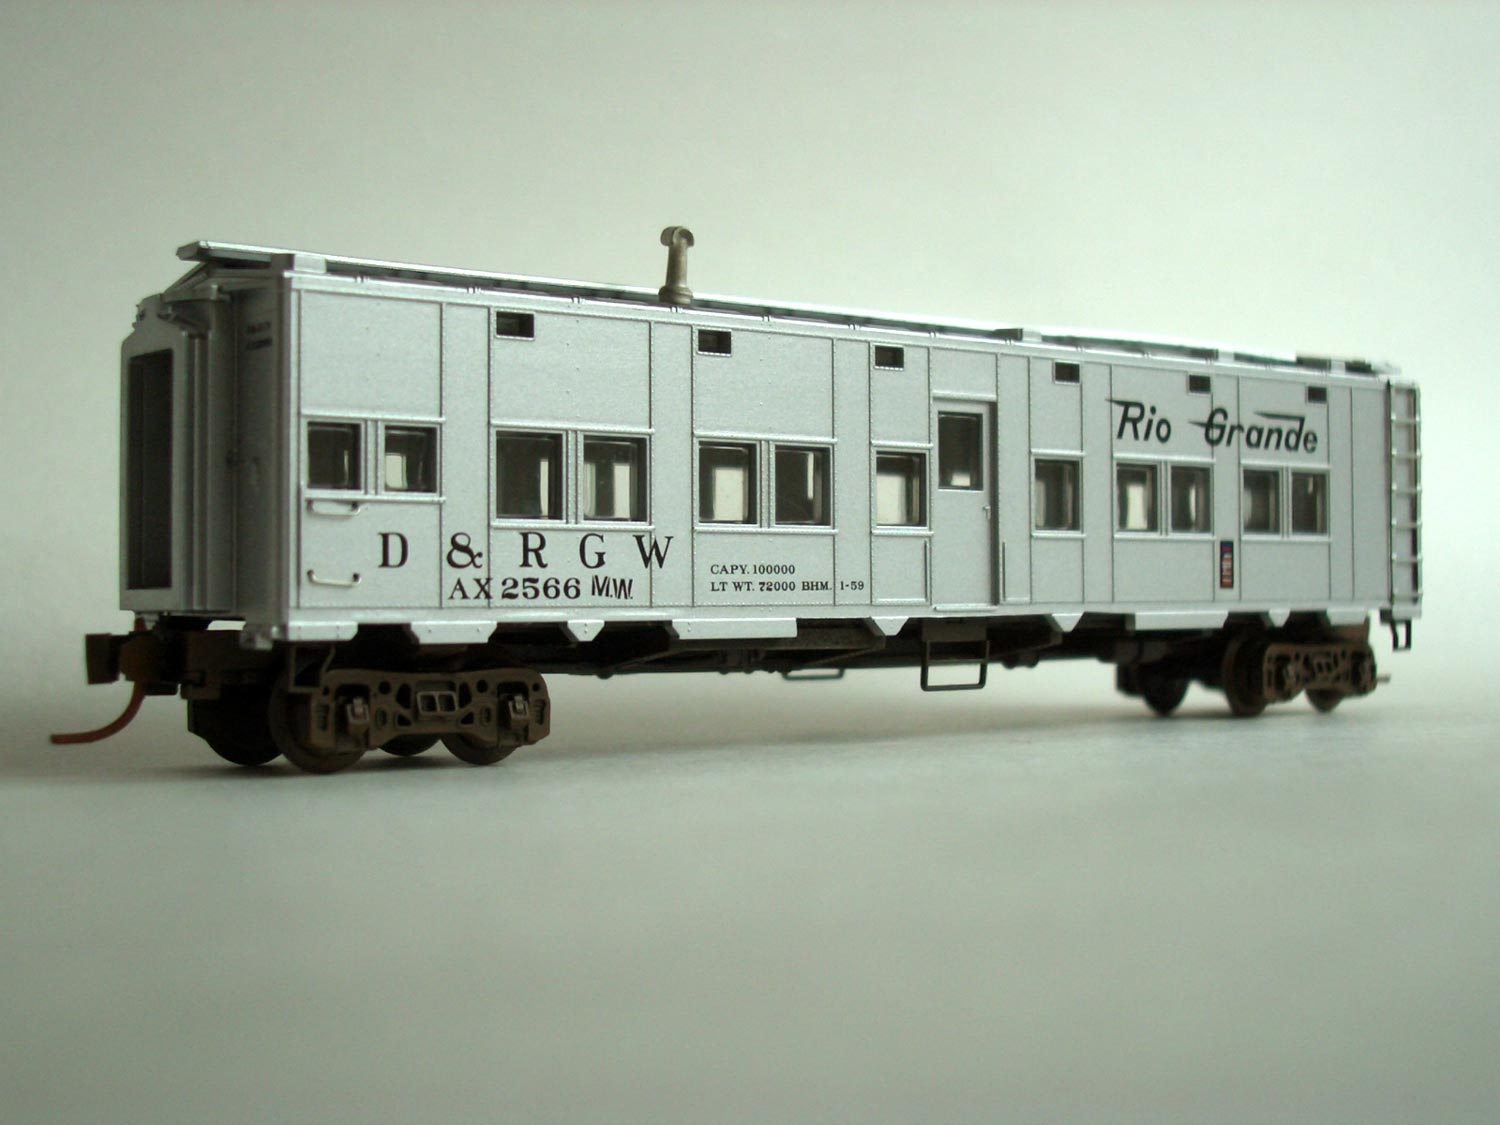
Works - DRGW Extra Gang Sleeper AX2566 - 01 [Works_MOW Equipment]
 : the car and the parts
I decided to bring my MTL Rio Grande MOW Sleeper an atmosphere of the '70s.
Missing is the roof-walk and ladders. So, I tried to add them to the factory painted models.
The parts I used are;
MTL#499 55 910 Steel Roof-walks.
GOLD MEDAL MODELS #160-25 Freight Car Ladders
BLMA #60 Drop Grab Irons
Sunrise #N-1001 Smoke Stack Caboose short
Works - DRGW Extra Gang Sleeper AX2566 - 02 [Works_MOW Equipment]
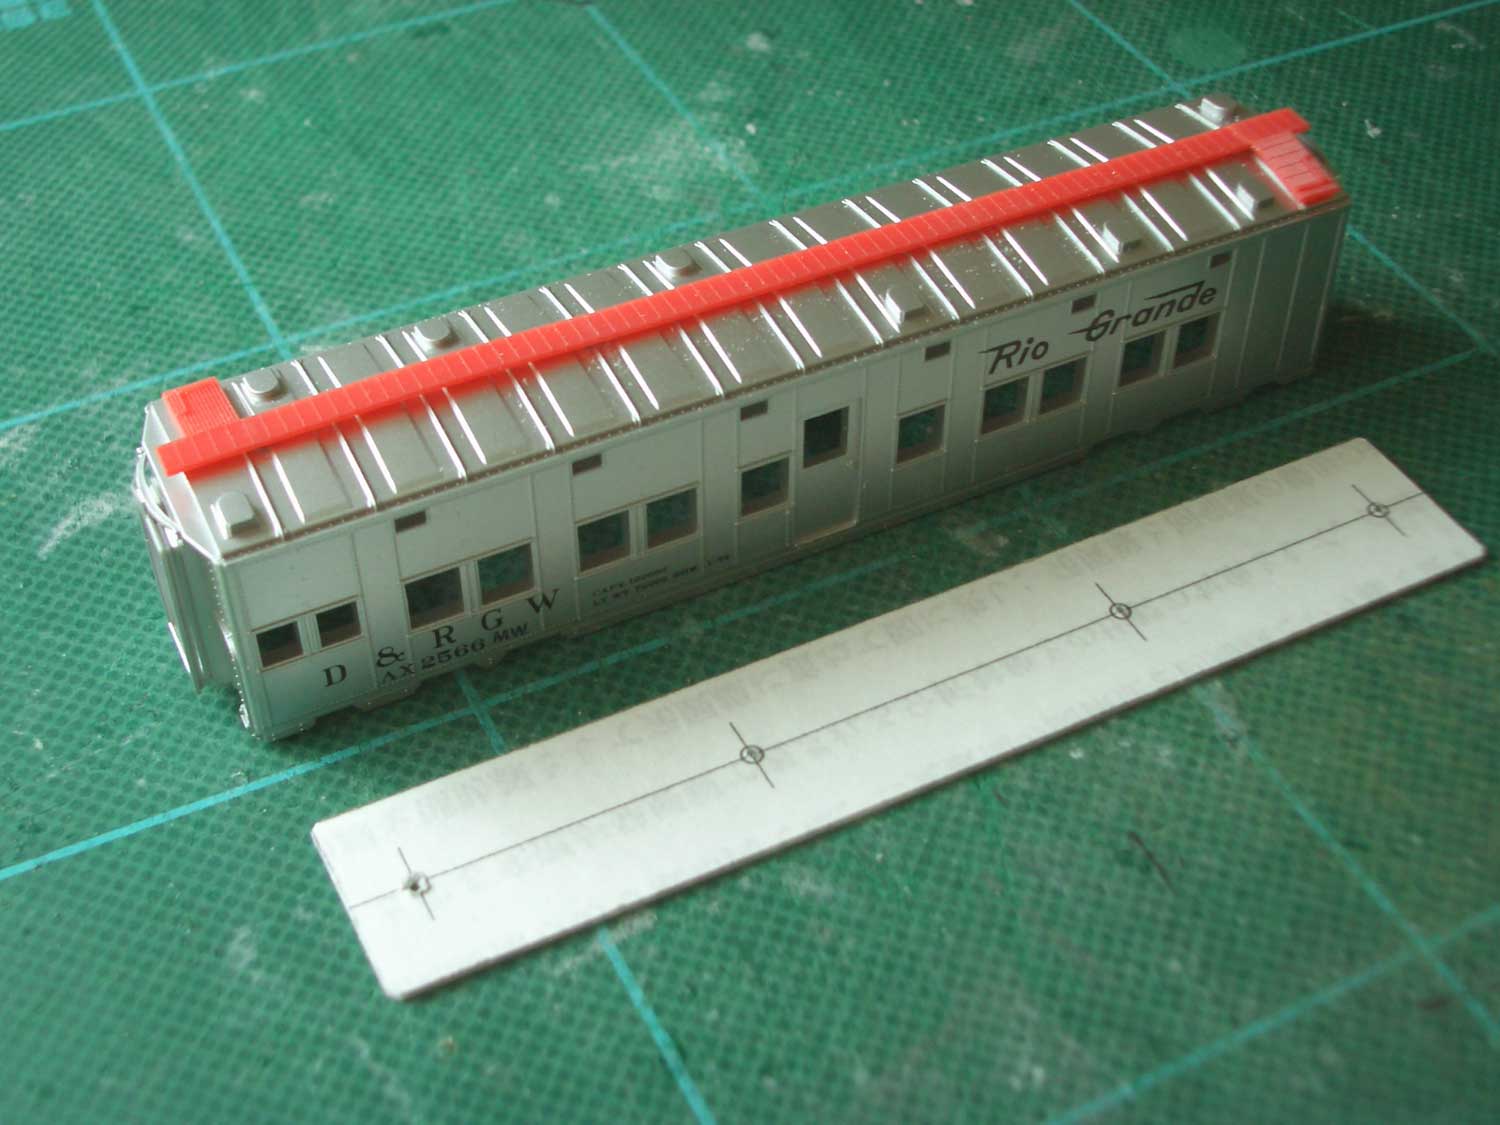 : roof-walk installed body and the template I used to make holes
I started with cutting the sill to make the factory painted models more accurate. I also shove the handrails on the ends. Next, I added the MTL roof-walk using self-made template. The template fits inside of the body like a ceiling.
The reason why I use MTL roof-walk; the metal parts easily wave during the work, they look too thin from the side, they have no or poor flap for gluing, they refloat by thermal expansion during the summer. Sigh.....
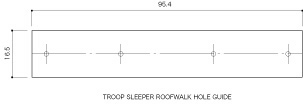 : drawing of the template
Works - DRGW Extra Gang Sleeper AX2566 - 03 [Works_MOW Equipment]
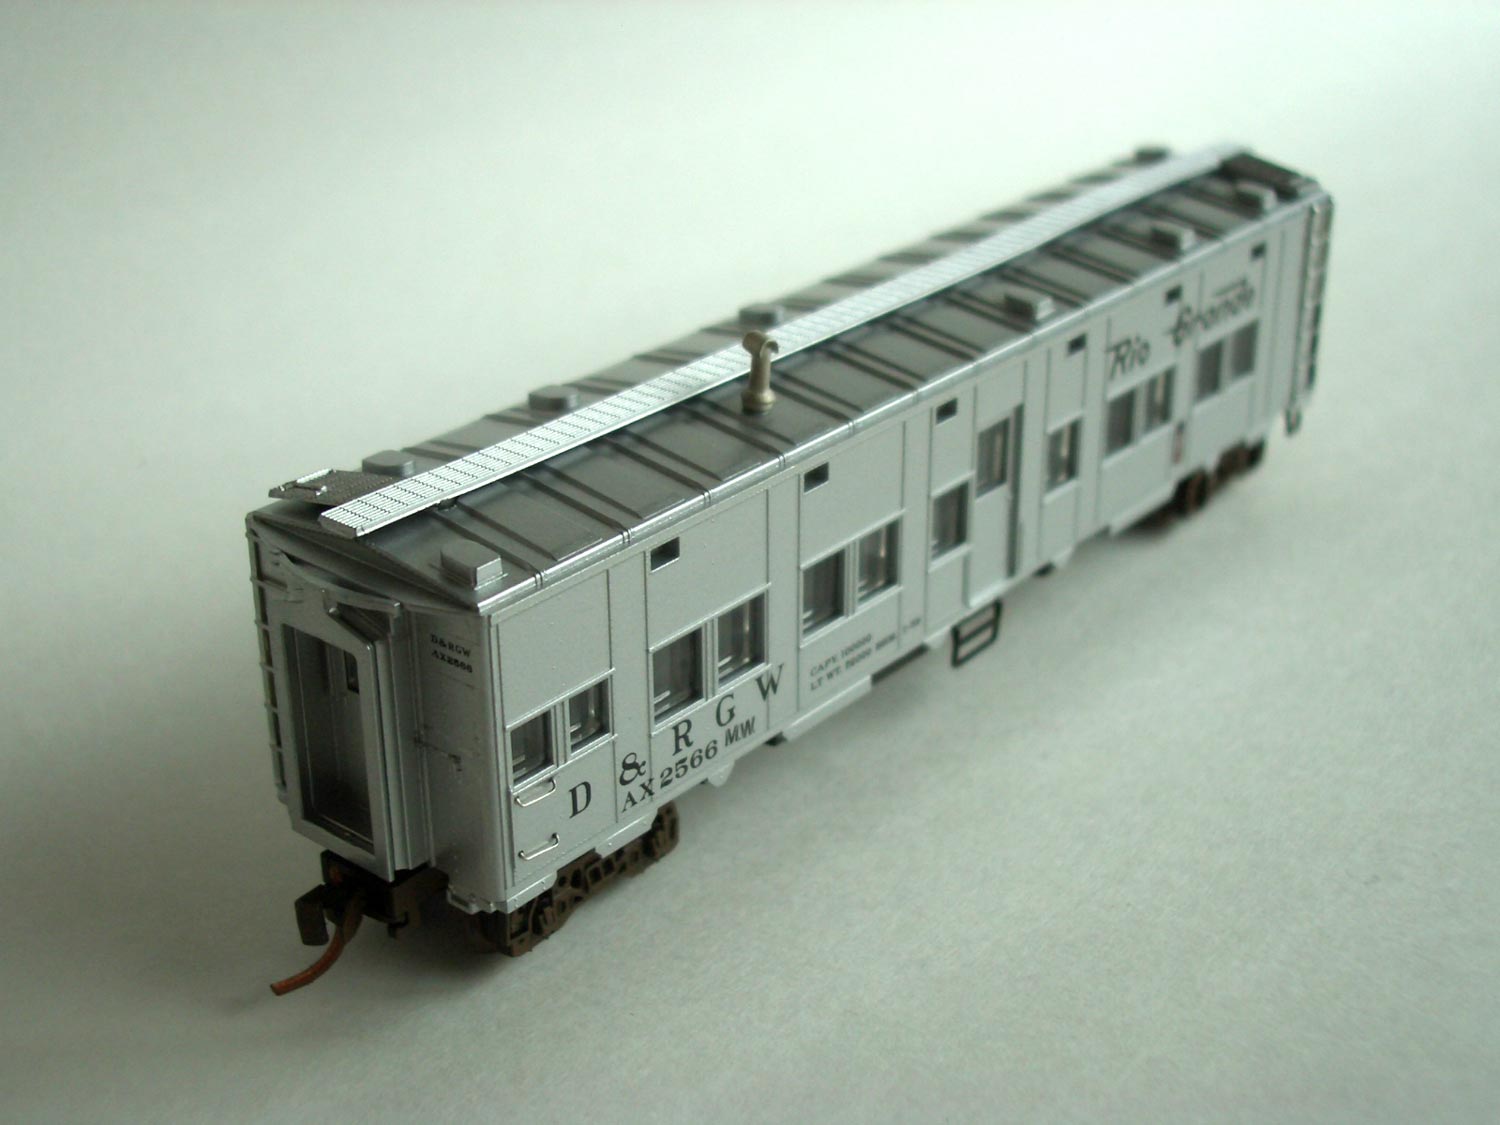 : D&RGW AX2566
I also added a smoke stack, ladders, and stirrups. Before adding the parts, I spray-painted silver to the ladders to reduce masking.
I also spray-painted the car ends with TAMIYA TS-30 to hide the mark of shaving the handrails. Smokestack made of white-metal and stirrups made of stainless were left raw.
As I don't have to apply decals except for ACI plates, these are the whole work I've done. Someday if I get prototype pictures of the exact car, I may fill some windows accurately.
DRGW AX2560 series Extra Gang Sleepers:
According to the MSCG, AX2560 series Extra Gang Sleepers were converted from troop sleepers built in 1943-44. 1988 MSCG photo shows the tip of AX2566 accompanied by AX2410. but Jan. 1971 Summary of Equipment lists X2011- X2071 and X3401 - X3418 as MOW sleepers. The book Rio Grande: Ruler of the Rockies has a 1981 photo of AX3415.
According to the 1965 DRGW Rules and Regulations, “X” cars, except those stenciled with an “A” prefix, are rear-enders and must not be handled more than 20 cars ahead of the rear end of the train. Cars with an “AX” stenciling have no restriction and may be handled at any location in train.
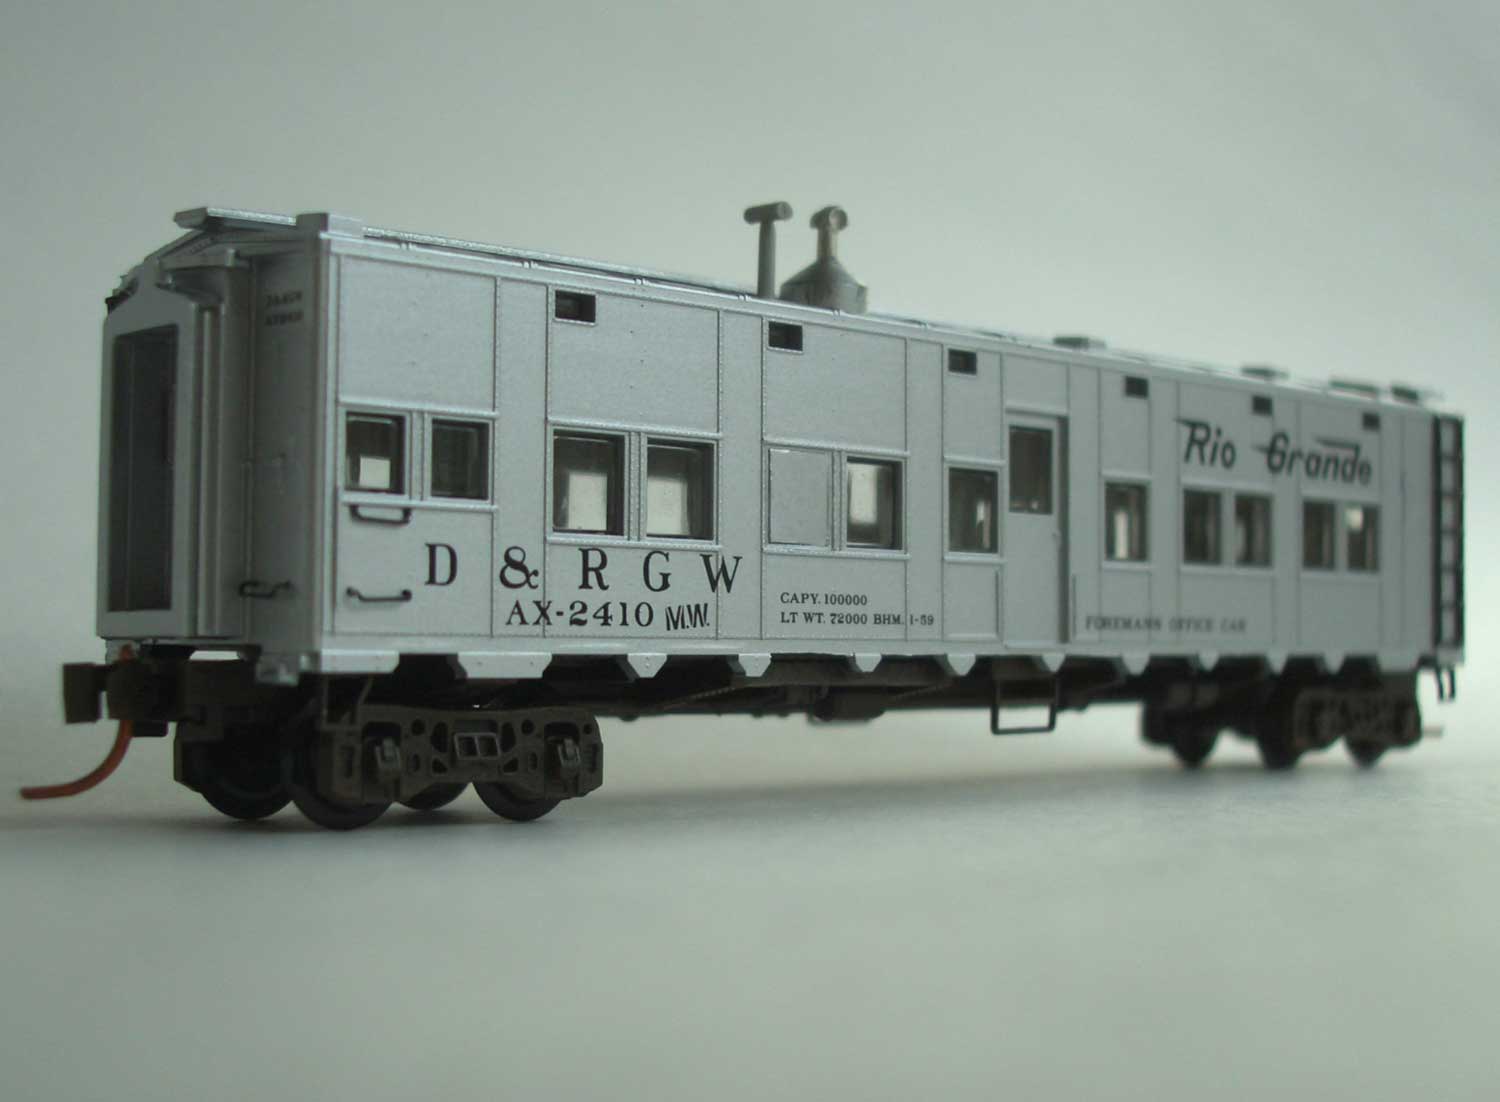
Works - DRGW Foreman Office Car AX2410 [Works_MOW Equipment]
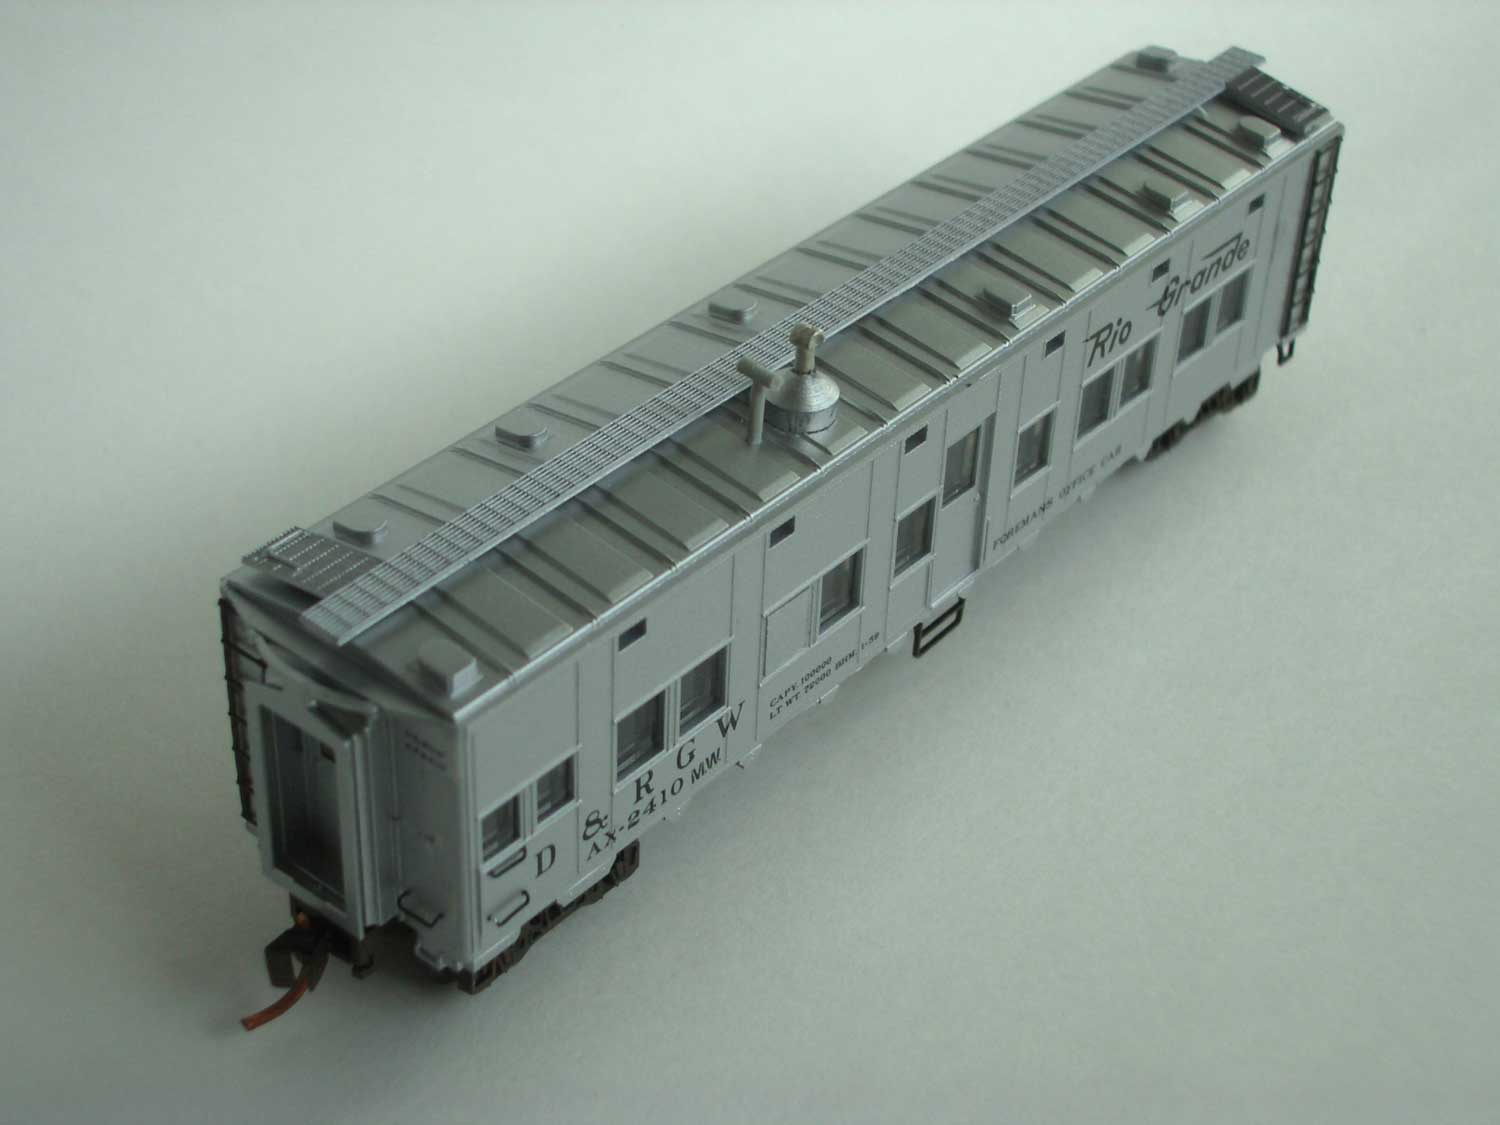 : DRGW AX2410
Assorted with the MOW sleeper AX2566, MTL distributed this Foreman Office Car AX2410 in Jan. 2004.
We can see both sides of the exact car thanks to emd111 and John Tudek; Photo by emd111 on the webpage and photo by John Tudek on page 110 of the MSCG book. These help us a lot detailing the car.
My work was almost the same to previous AX2566 except plating some windows. This time I painted ladders and stirrups black according to the references. The round base of the chimney was shaved from a 5mm plastic rod. Chimney itself is a Sunrise product. The other smoke stack is a surplus from Tichy MOW car kit.
DRGW AX2402 - AX2411 series Foreman Office Cars:
According to the MSCG, DRGW series AX2402 - AX2411 were converted from troop sleepers built in 1943-44. Besides MSCG, Jan. 1971 Summary of Equipment lists AX2378 - AX2411 as Foreman Office Cars.
Prototype photo of AX2410 by emd111;
The list of parts
MTL#499 55 910,Steel Roof-walks.
GOLD MEDAL MODELS #160-25 Freight Car Ladders
BLMA #60 Drop Grab Irons
Sunrise #N-1001 Smoke Stack
Surplus parts from Tichy "CREW CAR" kit #2703
 : DRGW AX2410
Works - DRGW Dynamometer Car #10 - 01 [Works_MOW Equipment]
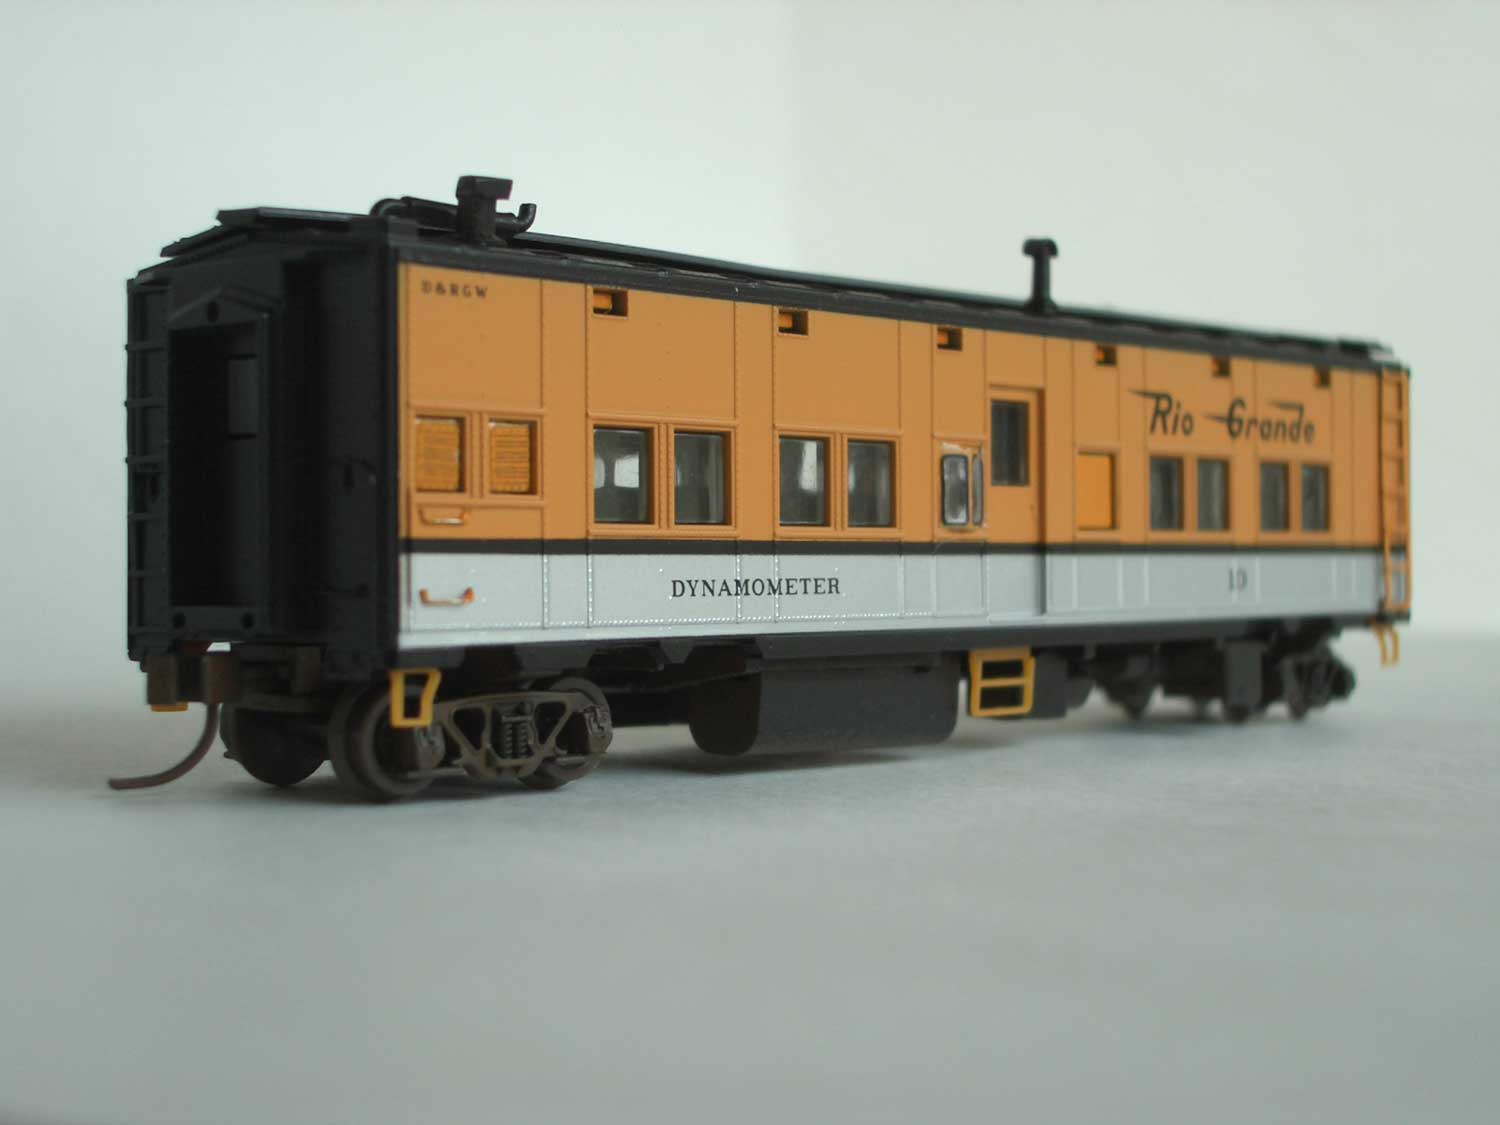 : Denver & Rio Grande Western 10
As I suggested in the previous article on under-frame equipment, the work for the Rio Grande Dynamometer Car produced by MTL in June 2010, was proceeding only in my mind.
We have enough references for the detailing; MSCG book, web pages, HO scale brass models.
Puzzling me was not what to make but how to make. I must provide under-frame equipment, rooftop smokestacks and vents, roof walk, ladders, stirrups, and the bay windows.
The most characteristic evidence for the appearance of the car may be the little bay windows. The bay window just fits one of the original windows on each side. This means I have to make 2 tiny parts at the same time.
Moreover, the bay has a flush-fitting window fixed with black gasket. The thickness of the material would break the image, even if I used 0.3mm plastic sheet. Using brass sheet would result only in wearing out my fingers. So I decided to use surplus thick clear plastic from the junk box.
When I broke up the model, I found that the model has interior, representing the bench seats. I think previous MTL Rio Grande MOW cars didn’t have that.
Prototype photo showing the other side of the car shown in MSCG;
Photo of the HO brass model by Division Point;
Works - DRGW Dynamometer Car #10 - 02 [Works_MOW Equipment]
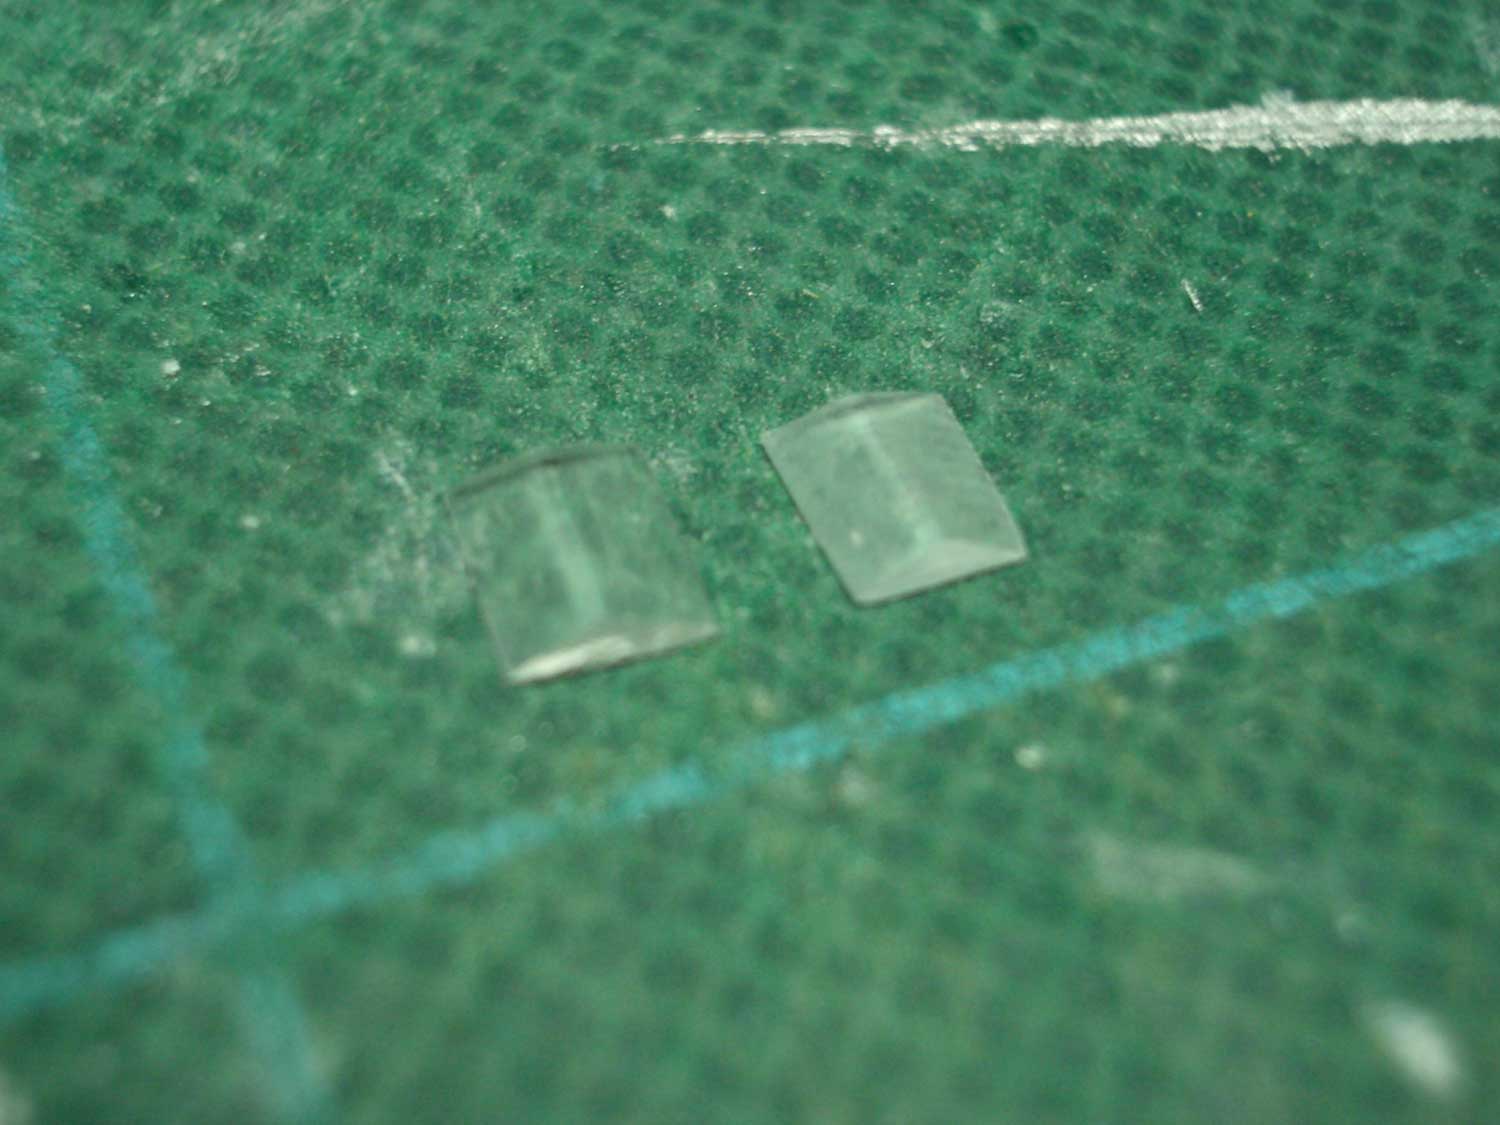 : bay window parts for DRGW 10
I shove and polished the bay window parts from an Atlas jewel case box.
The other parts I used for the roof and sides are;
・Smoke stack from Sunrise dead stock parts #N-1001,
・Ventilators shoved from parts in American Limited Models Passenger Car Roof and Underframe Accessories,
・Exhaust pipe and muffler from 1.2mm aluminum pipe and 0.8mm brass rod,
・Roof-walk by MTL #499 55 910 as usual,
・Ladders by GOLD MEDAL MODELS #160-25, also as usual,
・Stirrups by Blma #60, also as usual,
I shove and patched one of the original ventilators. I gave up shaving the sill of the car because the underframe by MTL where underframe equipment hung would show up if I do that.
 : exhaust pipe and muffler on the roof
Works - DRGW Dynamometer Car #10 - 03 [Works_MOW Equipment]
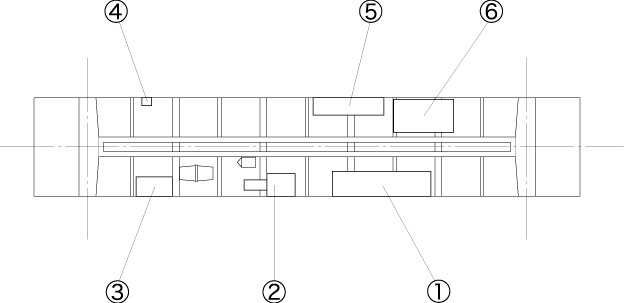 : underframe plan for DRGW 10
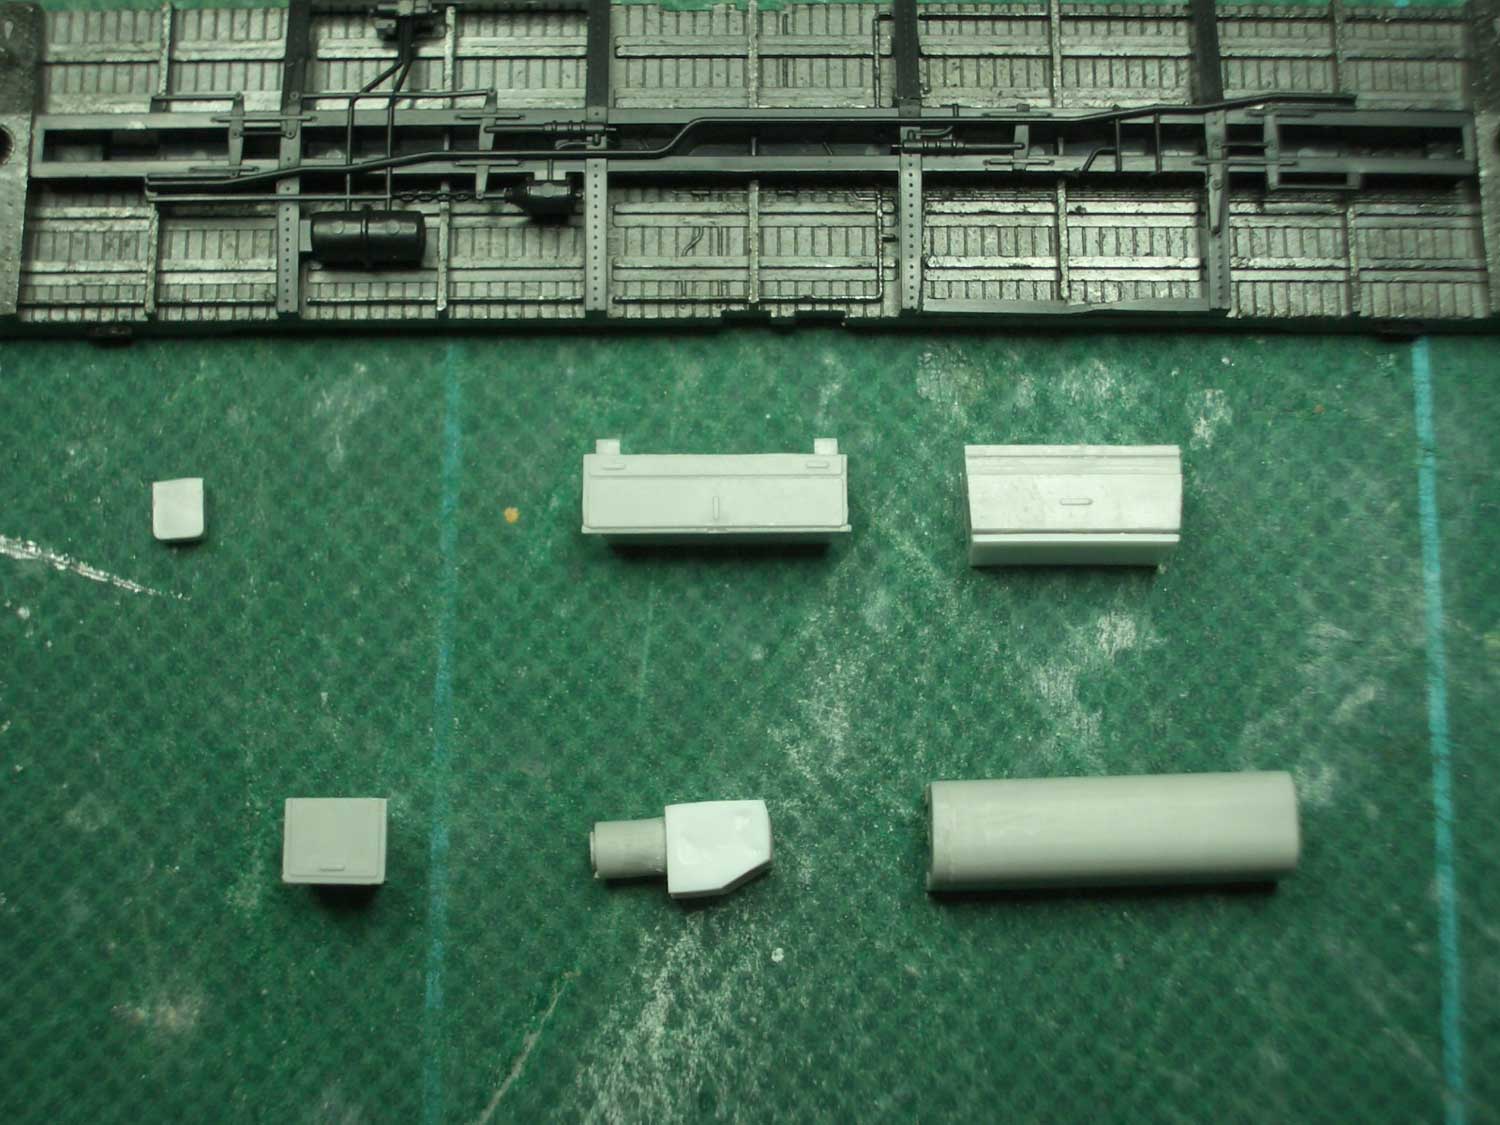 : underframe equipment for DRGW 10
Here is the belief drawing of the underframe of the car.
I referred a lot to HO scale model produced by Division Point.
As I wrote before, American Limited Models parts don’t fit this car. I cut and/or added plastic plates to all the parts I used.
Here is how I made (part numbers are from the picture below);
・Equipment No.1 was made by shortening ALM part No.25, water tank.
・Equipment No.2 was made from plating the side of ALM part No.23, compressor.
・Equipment No.3 was made by cutting and plating ALM part No.24, battery box.
・Equipment No.4 was also made from ALM part No.25.
・Equipment No.5 was made by cutting and plating ALM part No.8, propane fuel carrier.
・Equipment No.6 was made by cutting the side of ALM part No.5, battery box.
All the equipment were plated to box, as some of the parts were used turning 90 degrees.
I also cut some underframe details made by MTL.
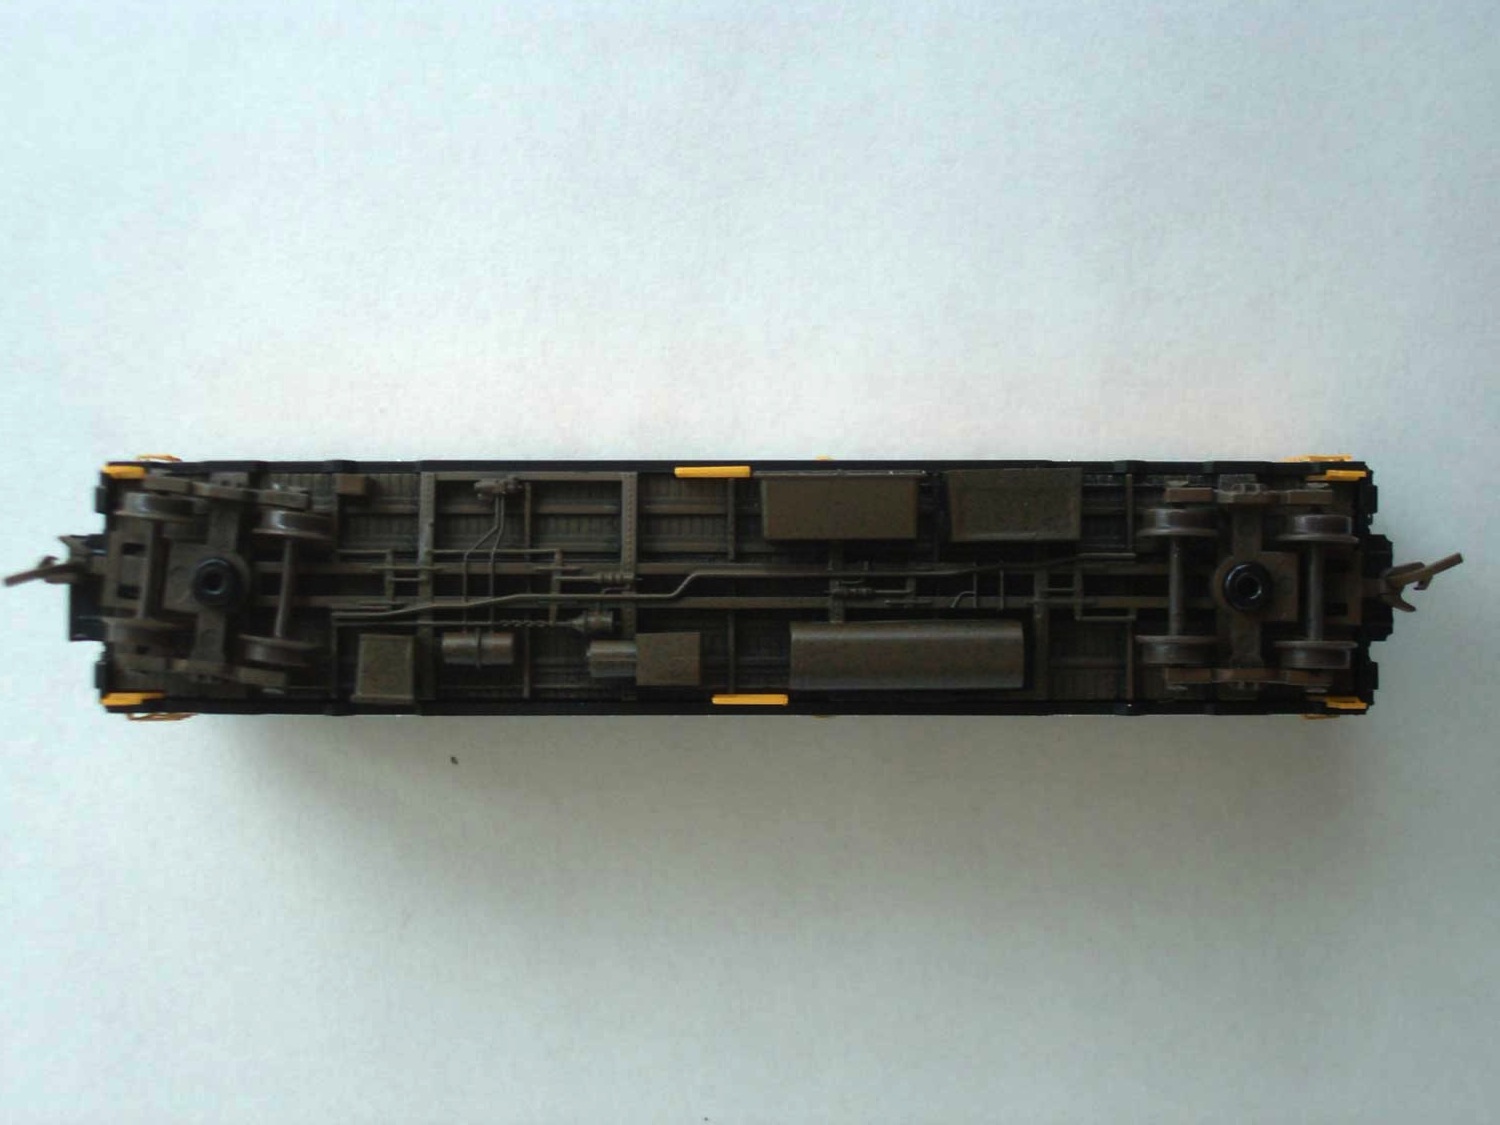 : results of the underframe work
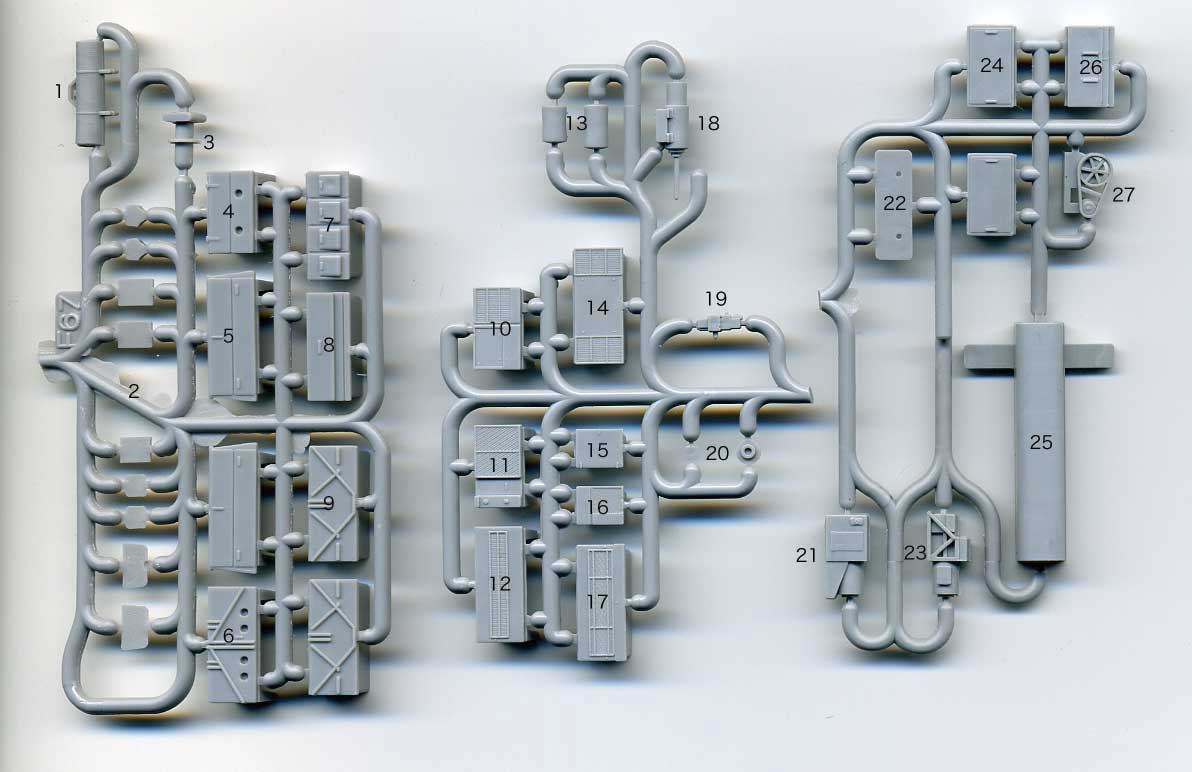 : Passenger Car Roof and Underframe Accessories by American Limited Models
Works - DRGW Dynamometer Car #10 - 04 [Works_MOW Equipment]
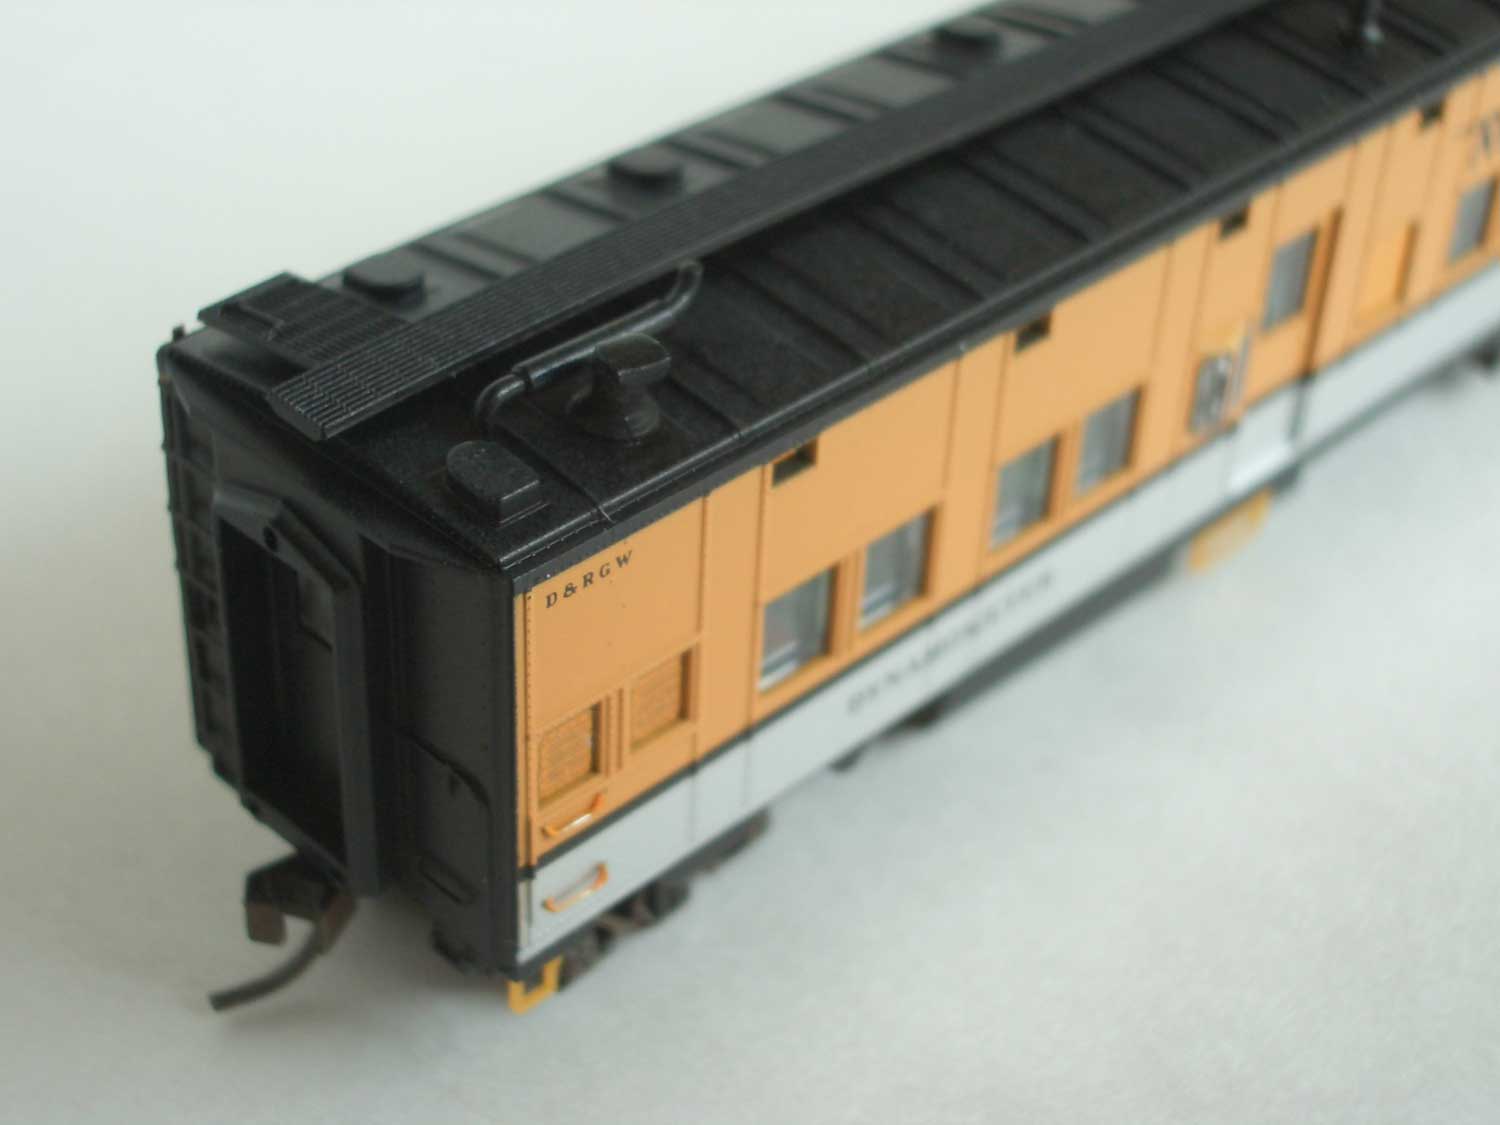
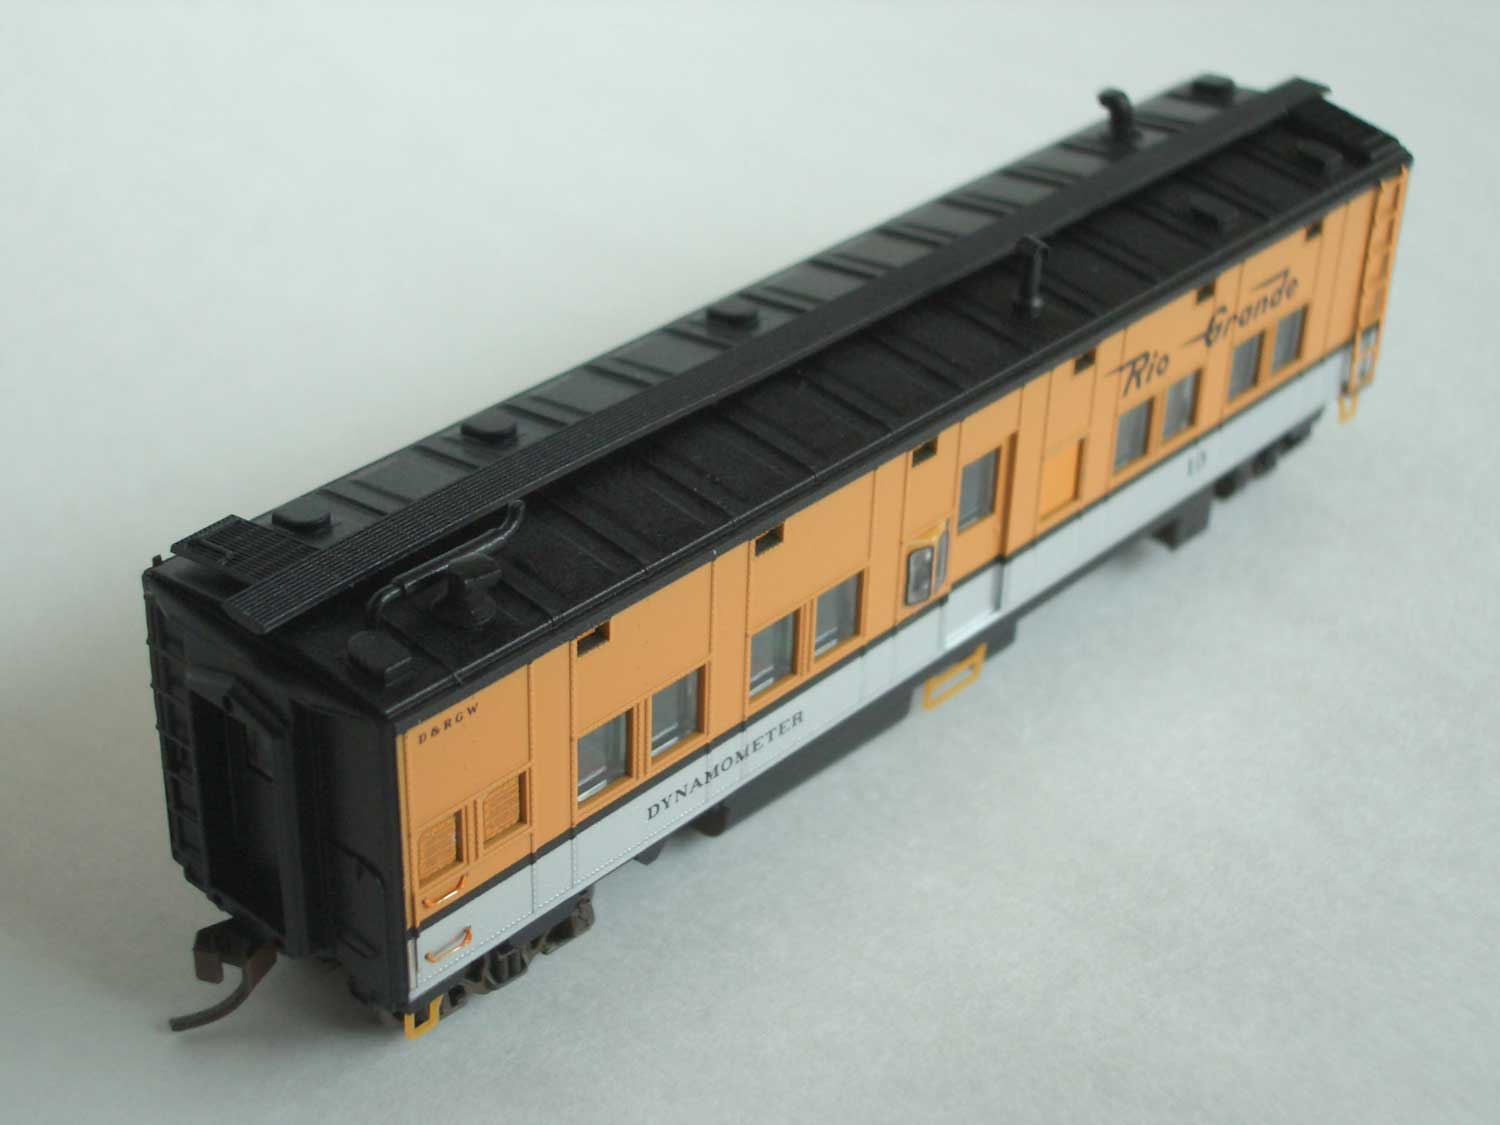
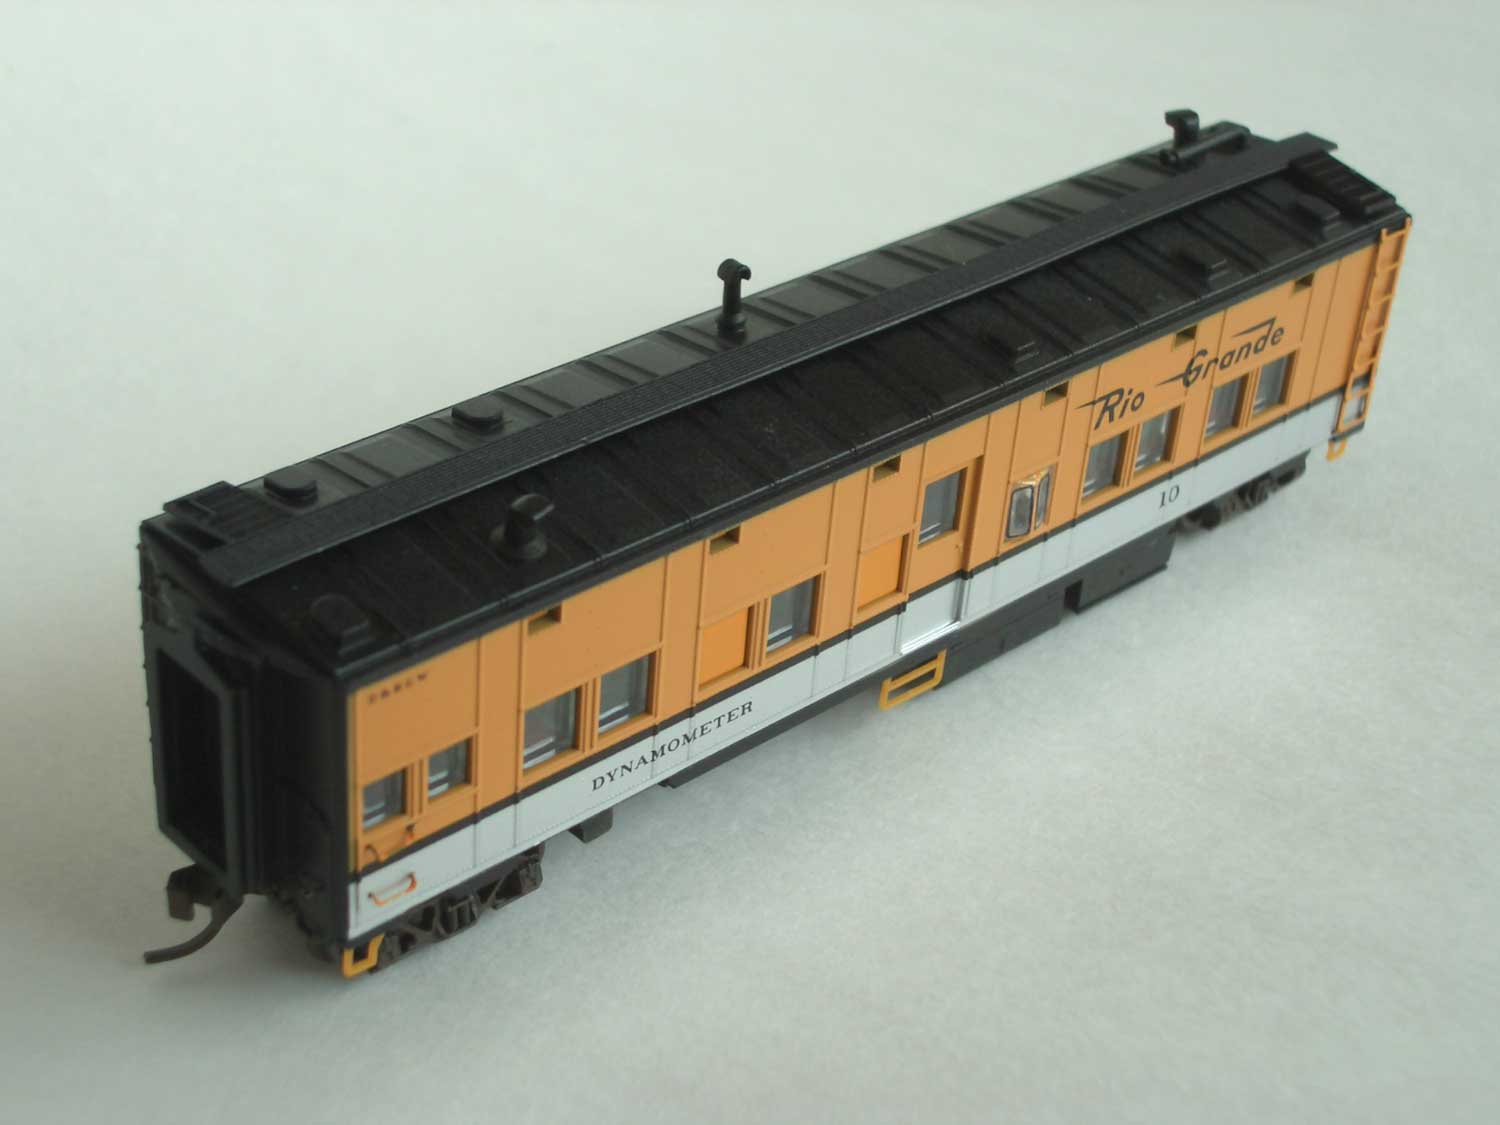 : DRGW 10
I started painting with the bay window parts. The other parts followed them. All the parts were installed after painting.
I used TAMIYA TS-56, Brilliant Orange, for the bay window and plated windows. TAMIYA TS-29, SEMI GLOSS BLACK, for the roof and the underframe. I spray painted clear semi-gloss to the place where I painted Brilliant Orange because they were glossy. The seats and interior walls were hand painted green with TAMIYA XF-71, Cockpit Green.
Besides bay window gaskets, I also tried to represent louvers and rivets by self-made decal.
I swapped the 3 coil-springs MTL trucks with surplus (maybe Athearn) 2 coil-springs Bettendorf trucks, for just my taste.
That’s all for this project. Thanks to MTL, I could add a neat car to my collection.
DRGW Dynamometer Car #10:
According to the MSCG, #10 was rebuilt in 1961 from Rio Grande MOW equipment. It had bay windows, air conditioning, an engine and generator set to power the dynamometer equipment. Though a constant companion to the Krauss-Maffei locos, Rio Grande used #10 to test many other locomotives.
 : DRGW 10
arx_Ph.D. さん

Here represented are my model railroad enthusiasm generated from the photos I took during my childhood at Knoxville, Tennessee, or from the photos I took during my recent trips.
I'm a retired professor of design, meanwhile a part-time associate at the architectural design office in Osaka, Japan where I live with my wife.


