Paint Shop – 68 : Clinchfield Railroad Boxcar 5680, part 1 [Works_Boxcars]
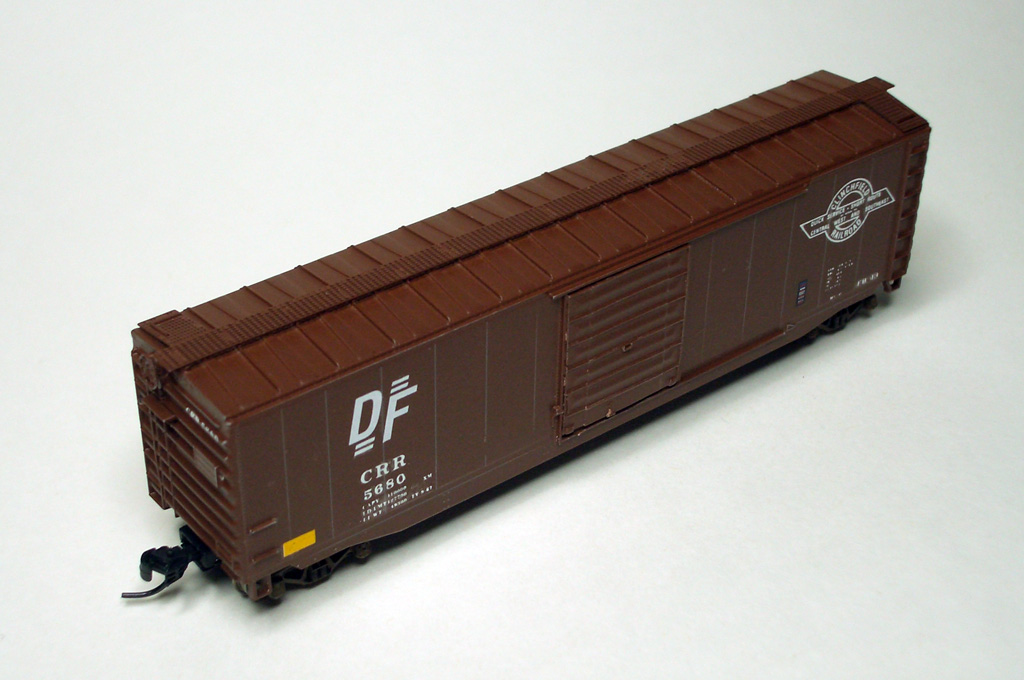 : completed model
My previous CRR boxcar project left quite a quantity of letterings including the “QUICK SERVICE” Herald on the decal sheet. So, I decided to consume some of them this time.
A photo of CRR #5655 but in poor shape is found at Railroad Picture Archives web site: it is covered by rust all over the body. So, I decided to make CRR #5680 from the same series found in my prototype photo stock: the “QUICK SERVICE” Herald is clearly shown in the photo. However, unfortunately, I can’t represent the particular photo here because it was pulled from an eBay site which I missed bidding.
I used a surplus Athearn PS-1 single-door boxcar for the model. I changed the door with copied and modified 8’ Pullman door produced by Atlas.
I tried using glue (Cemedine Black Super X Adhesive) to fill the gap of the door: wiping out the excess with Kimwipe and IPA (Isopropyl Alcohol) after applying the glue on the gap. I think this method is somewhat useful when you don’t want to lose the existing details like rivets or seams by filing.
I spray painted the body with Tamiya TS-62. I polished the surface of the painted body, where decals were going to be applied, with the compound before applying the decal for the better adhesion. Decal used is Microscale #60-966. “DF” stencil came from Microscale #60-1506. I spray painted the semi-gloss clear coat after applying the decal.
* 2003 photo of CRR #5655 but in poor shape found at Railroad Picture Archives web site;
* the decal I used;
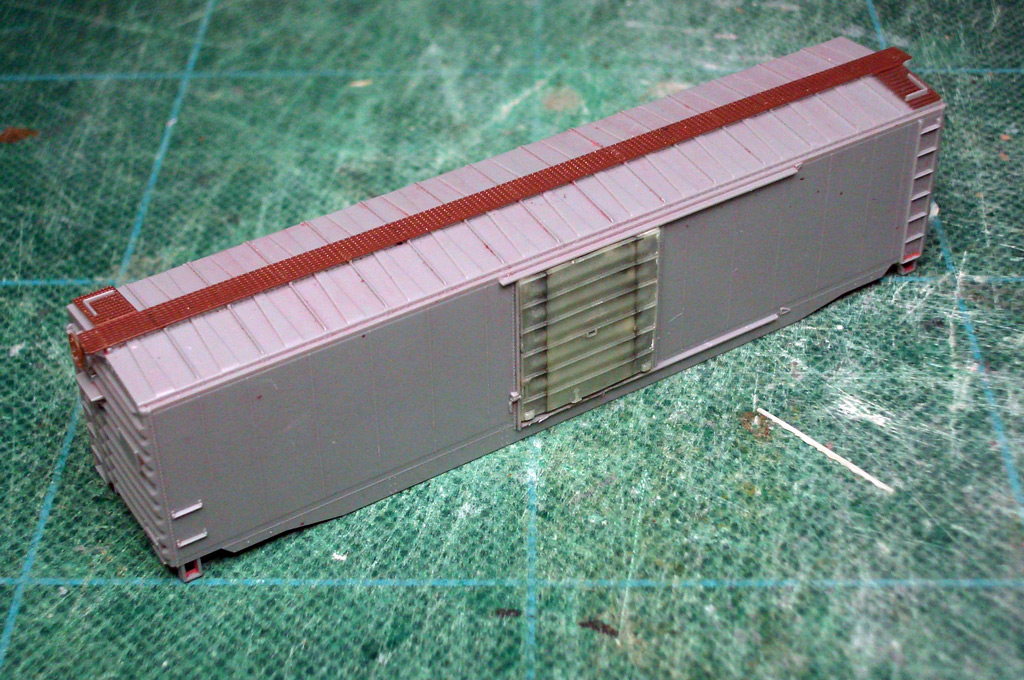 : body ready to paint
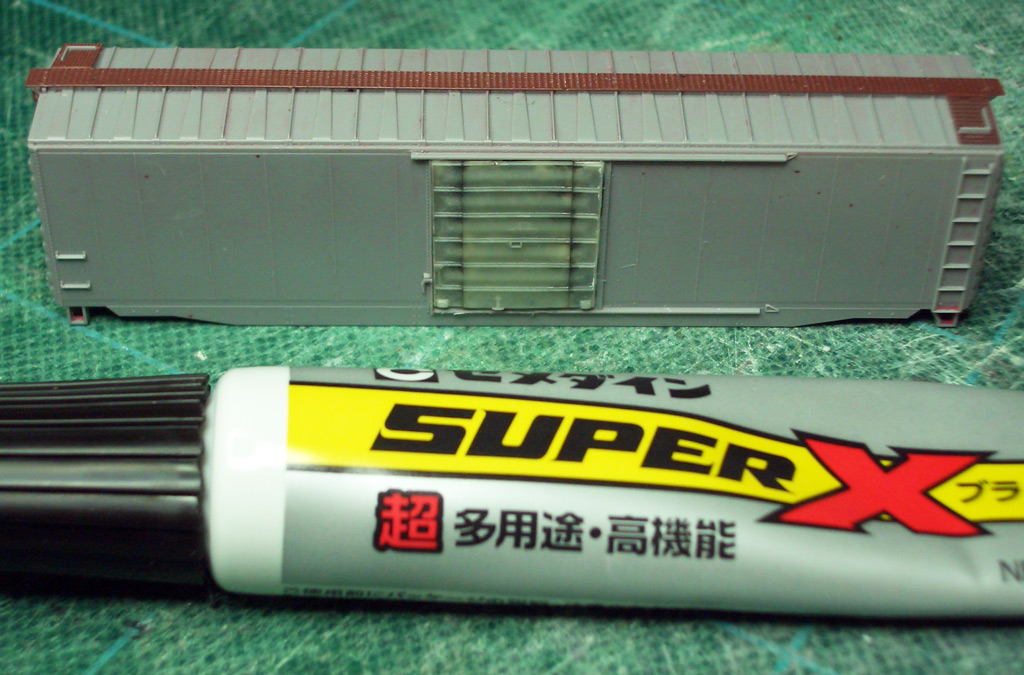 : gap on the door filled with glue
以前に制作した際に使い残したデカールを活用した作例である。参照するプロトタイプの写真はかつてeBayに出品されていたもの。買っていないのでここでお見せできないが、1980年撮影とある。車番から類推して1960年Pullman社製で、件の写真にACIプレートが写っているので筆者が設定する1970年代初頭という年代設定にはこの出で立ちであったはずだ。
模型にはAthearn社製PS-1 single-door boxcarを用いた。側扉を削り、Atlas社製PS-1 boxcarに附属のPullman社製扉を型取り複製した扉を貼り付ける。Atlas社製の扉は8フィート幅、プロトタイプは9フィートなので切り継ぐ。どうしてもうまくいかない継ぎ目は、後からスーパーXを塗り込みIPAをキムワイプに含ませ拭き取り埋めた。この方法だと、サンドペーパー掛けが必要なパテと違って、せっかくのディテールが消えないし、なんといっても簡単。隙間を埋める程度なら乾燥に伴う「退け」も気にならないし、塗装も問題なさそうだ。
サフェーサーを吹いたあと、TamiyaのTS-62で塗装。デカールの浮きを防ぐため、デカールを施す箇所は予めコンパウンドで磨いておく。デカールはMicroscale #60-966(の使い残し)。最後に半光沢のクリアコートを吹けば、艶の差は消える。
2020-03-13 09:00
コメント(0)
arx_Ph.D. さん

Here represented are my model railroad enthusiasm generated from the photos I took during my childhood at Knoxville, Tennessee, or from the photos I took during my recent trips.
I'm a retired professor of design, meanwhile a part-time associate at the architectural design office in Osaka, Japan where I live with my wife.


コメント 0