Works - Great Northern Railway Caboose X187, part 3 [Works_Cabooses]
 : MTL car cut to parts
I’m trying to create Great Northern Railway caboose X187 for my “bringin’ back the scene” project.
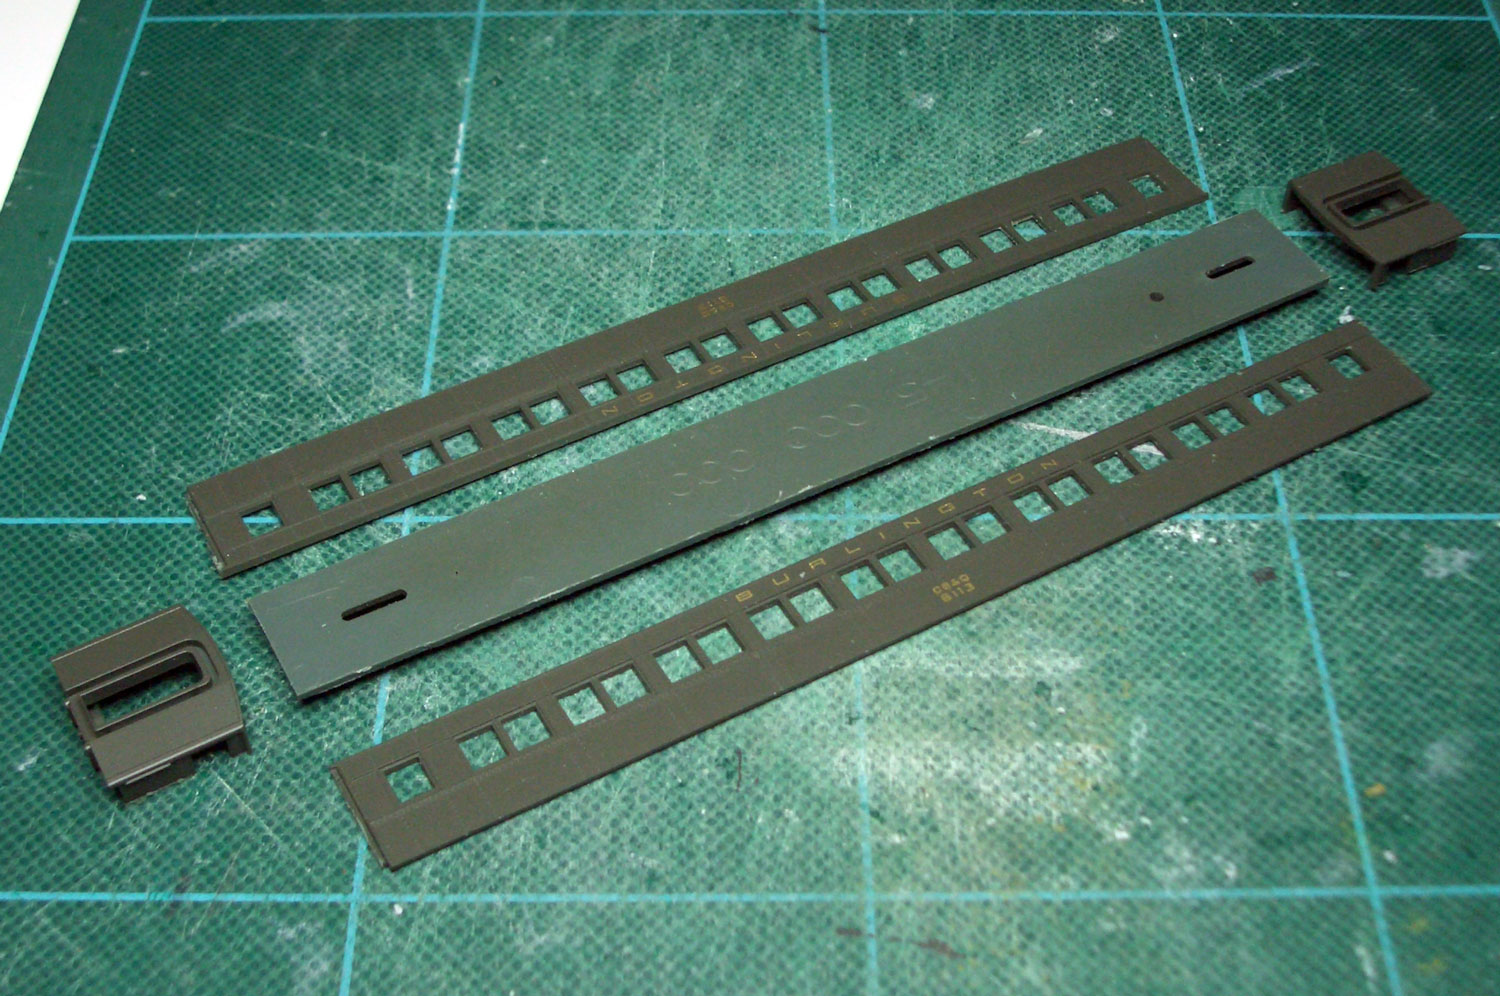
I cut the MTL Heavyweight Paired Window Coach Car body to flat sides for the ease of work. I filled and opened the windows according to my plan shown before. Narrow window and baggage doors came from MTL Parlor Car. I shove the gutter to make letter board taller. This make the elevation a little more accurate to the prototype.
I added slim brass flat bar to represent the gutter. Some thin styrene sheets were used to represent the siding. I applied some rivets using Archer rivet decal. I kept the straight handrails represented on the sides of doors of the model. I used BLMA parts #93, Rear Fan Grab Iron for curved handrails.
I re-assembled the sides with shortened floor to make the car body. I had to add thin styrene sheet to the side of the floor to regenerate the thickness of the saw I used. Modified partition wall, seats, window glazing and the weight from MTL were re-installed to this car body.
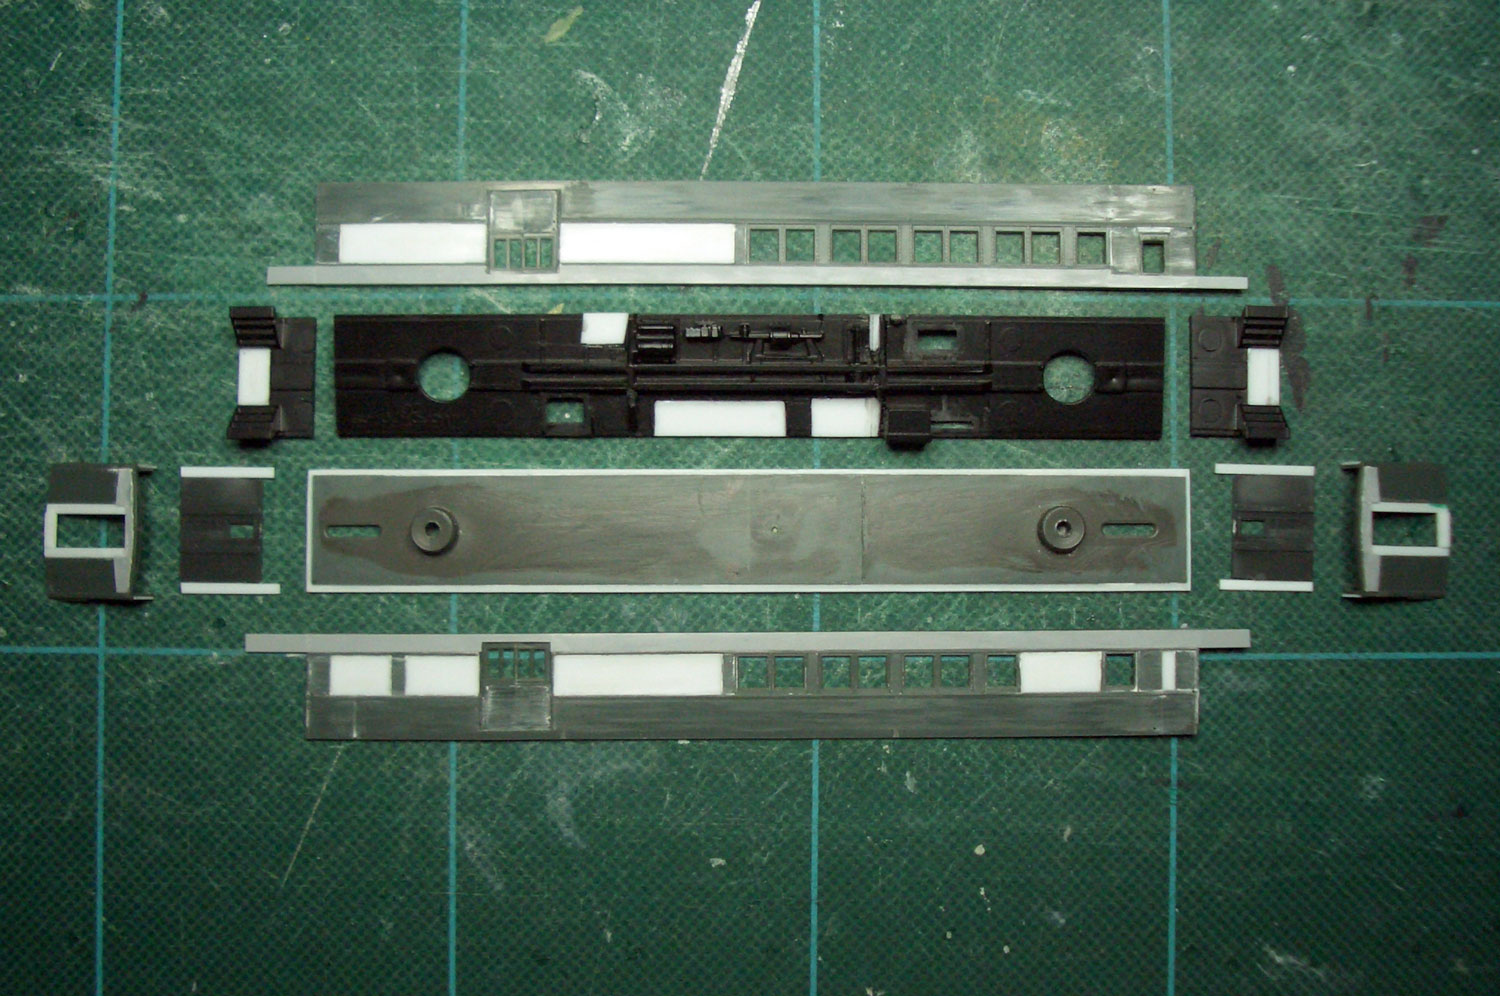 : car sides ready to re-assemble
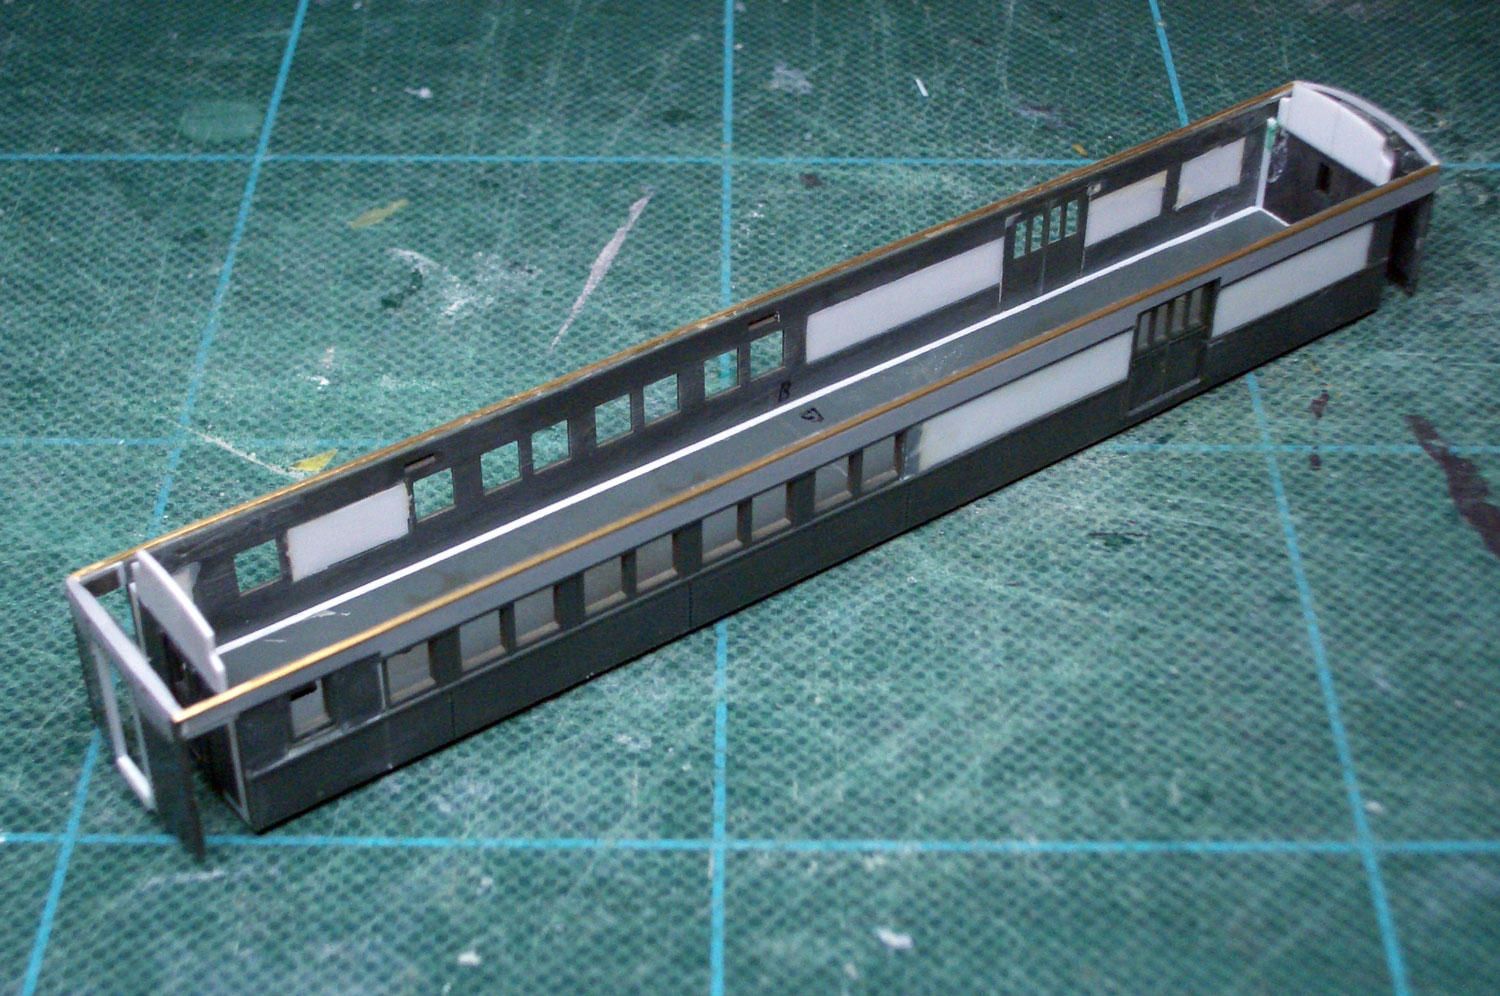 : re-assembled car body
GNのカブースを制作しようとしている。まず、丸ノコ盤を駆使して、箱状に成形されているMTL製の車体を開きにした。側面を切り継ぎ、窓を塞ぎ、荷物用開口部を開けたりする。妻面は幌受けを塞ぎ、貫通扉部分を開けたりする。
製品に表現されていた軒樋を幕板と同じ面まで削り、新たな軒樋として0.3ミリの真鍮板を上に載せ、少しだけプロトタイプのプロポーションに近づけてみた。扉がないため車体と幕板だけでつながる端部の補強にも少しは役立つだろう。
荷物用開口部の扉は、MTLのParlor Carの扉を2枚貼り合わせている。便所の小さな窓もそれから移植した。車体に取り付く窓ガラスや室内、ウェートなども適宜切り継ぎ収まるようにする。
切りくずと消えた丸ノコの刃の厚み分を床の縁に足してから、再び箱状に組み立てた。
2013-03-29 09:00
コメント(0)
arx_Ph.D. さん

Here represented are my model railroad enthusiasm generated from the photos I took during my childhood at Knoxville, Tennessee, or from the photos I took during my recent trips.
I'm a retired professor of design, meanwhile a part-time associate at the architectural design office in Osaka, Japan where I live with my wife.


コメント 0